🔮 Solidarity Infrastructures
Solidarity Infrastructures is a class that brings together creative practitioners to investigate, strategize, upskill, and dream toward alternative socio-technological systems.
The Solidarity Infrastructures class was conceptualized and co-taught by Alice Yuan Zhang and Max Fowler through the School for Poetic Computation in 2023. There have been four rounds of the class since then taught in collaboration with Meghna Mahadevan, Mark Hernandez-Motaghy, Oren Robinson, Olivia McKayla Ross, io hushpuppie, as well as many guest presenters and co-conspirators.
This is a website for sharing a public version of the technical learning materials that were created for the class. You can also see the non-technical course materials and reading list here. We have updated a couple things to publish them onto the public internet, but mostly they are still in their original form, so some things may be a bit decontextualized (mention of office hours, etc.), but they should be legible on their own, and we are happy that they can be used or adapted in any context.
Introduction: Hello World
Greetings 🌸
This document, and the guides in the technical wiki, were put together by @notplants (aka max). I'm happy to receive feedback on anything that is confusing or could improve things.
These guides were originally created for a group of students with a large mix of technical backgrounds, although the technical guides are oriented towards the students with less technical background and assume no prior knowledge.
Before we get into the tutorials, lets start with talking about how we're approaching technical learning in this class, how these guides are informed by past seasons of this class, and a life-time of loving and hating computers and the people who make them.
Healing Our Relationship To Learning About Technology
We each bring our own history and relationship to technology and learning, and I want to acknowledge that for a lot of people that's a really emotionally-laden, even traumatic, space.
If that's not the case for you, that's great, but there can be a lot to work through here. Even as someone who has been working as a programmer for a long time, I can still feel some of these things come up at different points, but I set the intention to actively unlearn them when they arise.
So part of the goal of this class is not just to teach people new technical skills, but to also provide a space to develop a new and more supportive relationship to technical learning.
-
"not understanding something" is not a problem, it's part of the process of learning
-
"code with red error messages" is not a failure, it's part of the process of writing code
-
even without fully understanding something, we can start, and learn along the way (this continues to apply at every level of programming experience— there is no endpoint where programmers understand every part of the computer — it is not humanly possible and there is always more to learn)
-
all questions are welcome
SFPC is not a test. The class is here to support you in your learning goals.
Technical Learning Goals
In season one of this class, in 2023, we explored having no specific technical learning goals. We just wanted to support people to learn what they wanted to learn about, and provide some asynchronous resources to help, mostly in the form of recorded video tutorials, with additional support in office hours.
This worked to some degree, but it also had limitations, and speaking with different educators since then has made us reflect differently on this.
For some people, not having a specific goal is not supportive to their learning, and they would actually feel supported by a goal.
So instead of saying there is no goal, our intention this time around is to say, here are the goals where we are all trying to get to as a group, and if you are having difficulty getting there, how can we help you to get there?
Of course, in the end, SFPC classes do not have grades, and there is in fact no one requiring you to learn anything offered in the class — take what works for you and leave the rest.
But in terms of orienting the class, we have chosen some technical learning goals that we hope will help support students to deepen their understanding of computers, servers, the internet, digital infrastructure, website-making, self-hosting, how to creatively work with digital infrastructure, and how to understand more about the tools they choose to use.
To reach these goals, there will be a combination of technical tutorial videos, in class technical learning time, written guides, office hours, and peer-to-peer-office-hours along the way.
Technical Curriculum
- Sourcing Hardware
- Getting Started With Terminal
- Installing Yunohost On Your Server
- Etherpad: First Local Application
- Tunnels: Getting A Local Website Visible On The Public Internet
- Permacomputing & Lichen-Markdown (Making A Webring)
- Methods Of Publishing HTML
- Backups: Encrypted, Automated & Manual

Sourcing Hardware
This is a guide to sourcing hardware for your server (aka a computer).
It is possible to participate in the class without setting up a physical server, either by using "the cloud", or by not setting up a server at all, but sourcing some computer you can use for the class will be helpful.
It can be a small, old, dusty, forgotten computer. If its just for the purposes of learning, it doesn't matter too much what capabilities the computer has (with some exceptions).
If you want to use your server after the class, for yourself, or for a community, more attention may be needed for the capacity of the server. This outline page will try to give some idea of what are good things to look for.

Buying a new computer is an option, but lets focus on trying to source a second-hand computer first (more ecological, and cheaper).
Some methods:
- asking friends
- looking in your basement
- craigslist
- facebook marketplace
- backmarket
- once a friend dumpstered some laptops out of a university bin, and we managed to mix and match parts between the discarded laptops to get a working laptop
Raspberry Pi
Rasperry Pis, a small open source computer, are sort of the classic computer of creative technologists and tinkerers, and there's a lot to love about them.
They are very much designed to not be a "black box", visually showing their internal components, and also being very hackable by design.
They also have a low-energy footprint, and are quite portable.
In past classes we encouraged Raspberry Pi, because it is cheap, well-known and commonly used in art and technology — but your mileage will really vary depending on what model you find.

The Raspberry model 5 is a good option, and for example has been used as the server for the infrastructure of collective action school, but for older models of Raspberry pi, such as the 3 and 4, while they work, its often much more limited what type of applications can be run on them.
And raspberry pi models which are older than a 3 are not supported by Yunohost.
Its also worth noting that there are other computers that are similar to Raspberry Pi (called single-board computers), but from other manufacturers. If you have access to one, these could also be a good option, but being less "standard" there may be more issues to solve specific to that hardware. Here is an article about single board computer alternatives: https://www.zdnet.com/article/best-raspberry-pi-alternative/
However even with the Pi 5, there is a complicated technical limitation that you might run into with Pis — Raspberry Pi have a CPU architecture called ARM and most servers in data centers have a CPU architecture called AMD.
It is a deep-dive to learn more about these different CPU architectures, but the end result is that many of the self-hostable applications are packaged for AMD but not for ARM, although many are packaged for both.
So if you get an AMD computer (which is most computers besides a pi), there is a broader range of useful applications you can run on it. I wanted to include this section on Raspberry Pi in the beginning since it is a very well known computer model. The next section will be on other types of computers besides the Pi.
Minimal Technical Requirements
Yunohost specifies that a computer it is installed on must have 512MB RAM and 16GB of storage capacy — but most computers you would find, even old ones, would satisfy this.

It actually may even be possible to turn an old phone into a server, such as was done with the project compost.party, but we would consider this an advanced project, and maybe not the first thing to try if your getting started.
Platonic Ideal Of A Home Server
While many computers can work as a server, from personal experience there is a category of recent "small-form-factor" computers that are small and work quite well for a range of server tasks, that I want to call out. If your able to get your hands on one of these, they are a great option that are easy to work with and can do a lot.

Here is a whole article about these small-form-factor computers:
In particular, some models to look out for:
- Intel NUC
- Lenovo ThinkCentre (our current class server that hosts this outline)
- HP Mini EliteDesk
- Dell Micro Optiplex
Some of these computers may be listed for 200-250 USD, but you may also find cheaper options as well. Some corporations and universities may also buy large amounts of these computers and also discard old models in bulk.
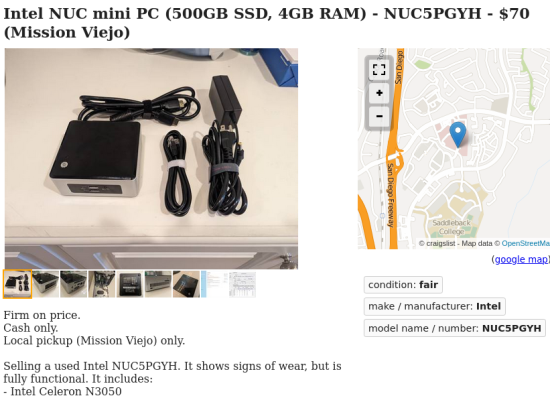
While these servers are an especially good option if you want to continue to use them after the class, there are many other computers that could work.
And again, "the most ecological computer is the one you already have" (or can find).
Energy Usage
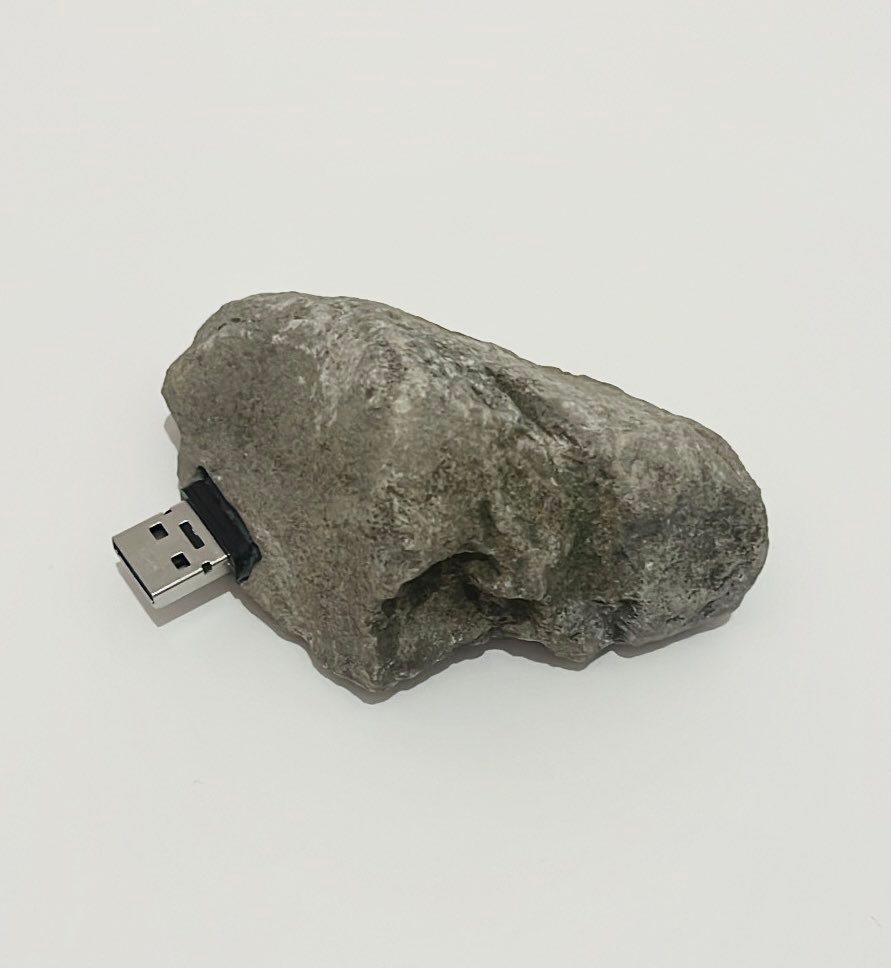
Interestingly, the biggest issue with older computers may not always be their processing power (depending on what you want to do), but how much energy they use. A lot of times old servers are replaced not because they have stopped working, but because it would be overall cheaper, including electric bills, to buy a new computer that can perform the same tasks but using less energy.
In the beginning of January 2025, I posted a thread on Mastodon asking about predicting how long a home server would run for before the hardware broke down, and I received some interesting responses.
Here was my question:
curious how long a lenovo thinkcentre basement server will live for and what will be the astrology on the day of its last breath - https://sunbeam.city/@notplants/113749320124760805
And here was one response from @forestjohnson@pixie.town:
But AFAIK, besides those things, death from old age is incredibly rare for computers. Most just keep on running long after they become obsolete (costs more to pay for electricity to run it than it would cost to get a new one that does the same job and uses less electricity)
Altho, who knows what will happen in the future — we may have hit some sorta fundamental limits in terms of energy efficiency of computers.
A full analysis of the embodied energy in a computer, in combination with the energy required to keep the server running, could become a complex question. For the sake of getting a computer for this class, I wouldn't overthink it, but it is a rabbit hole to go down if you want to think more about the energy requirements of different computers.
Microcontrollers
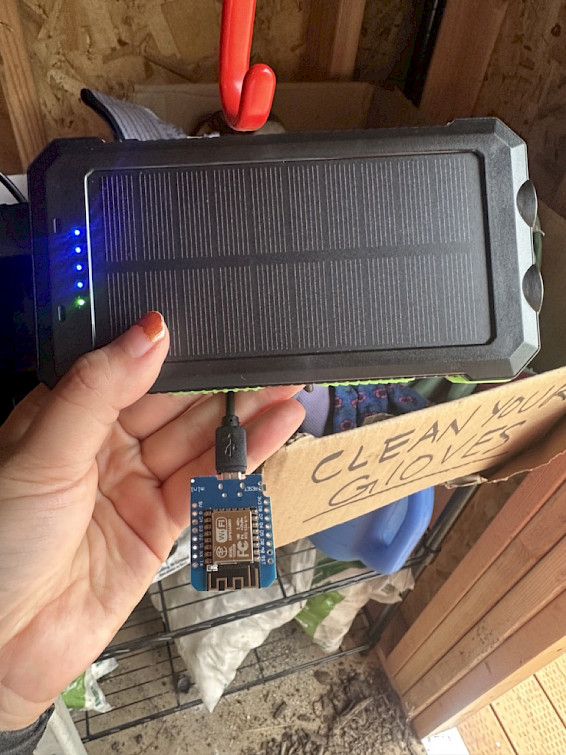
It is also possible to run a web server on a microcontroller (a computer even smaller than a raspberry pi), but again this would be a technically advanced project, and most micro-controllers would not be compatible with yunohost, and so would not be able used for working through the technical curriculum of this class.
But since we are talking about hardware here, thought I should also mention microcontrollers, as there is a lot of cool stuff you can do with them.
Some examples:
From Lillyanne Pham, a past Solidarity Infrastructures student: https://infrastructures.us/en/blog/lillyanne-pham/
Another interesting solar-powered microcontroller project: https://sometimes.digital/posts/solarpunk-web-server/
Some common microcontroller models people work with:
-
ESP32
-
ESP8266
-
Raspberry Pi Pico W
\
Accessories
Lastly, you need to have a few small things so you can actually use the computer you find (assuming its not a laptop). You need:
- a usb keyboard
- a usb mouse
- some type of screen that has a compatible cable with your server
- an ethernet cable to connect directly to your router is also often helpful (to avoid using wifi during setup)
As well as for installing the Yunohost operating system:
- If you are using a raspberry pi, you also need an SD Card that is compatible with your pi.
- If you are not using a raspberry pi, you need a USB stick with atleast 8GB of space.
And that should be enough to have "a server of one's own".
Feel free to send messages in Discord with any questions or potential servers you are looking at.
🔌 ⌨️ 🖥️
Tutorial: Getting Started With Terminal
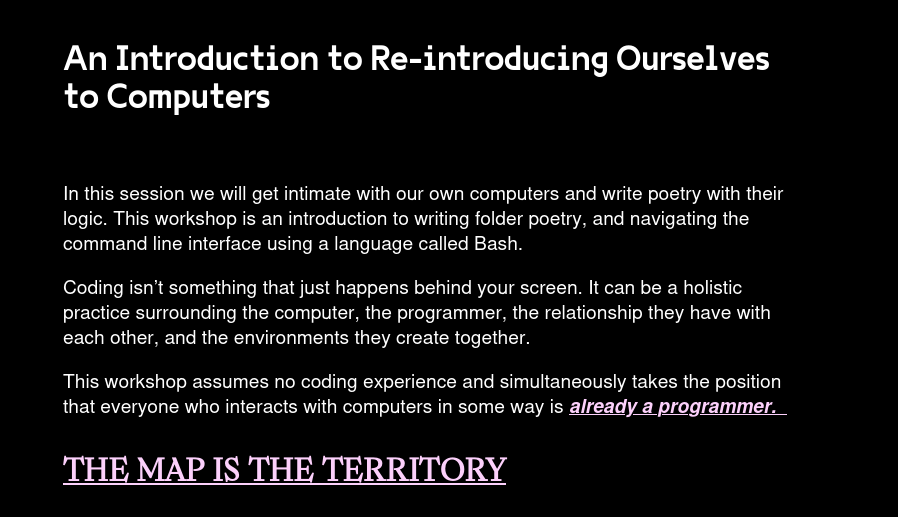
This is a tutorial on getting started in Terminal, which we will go through together on Week 2.
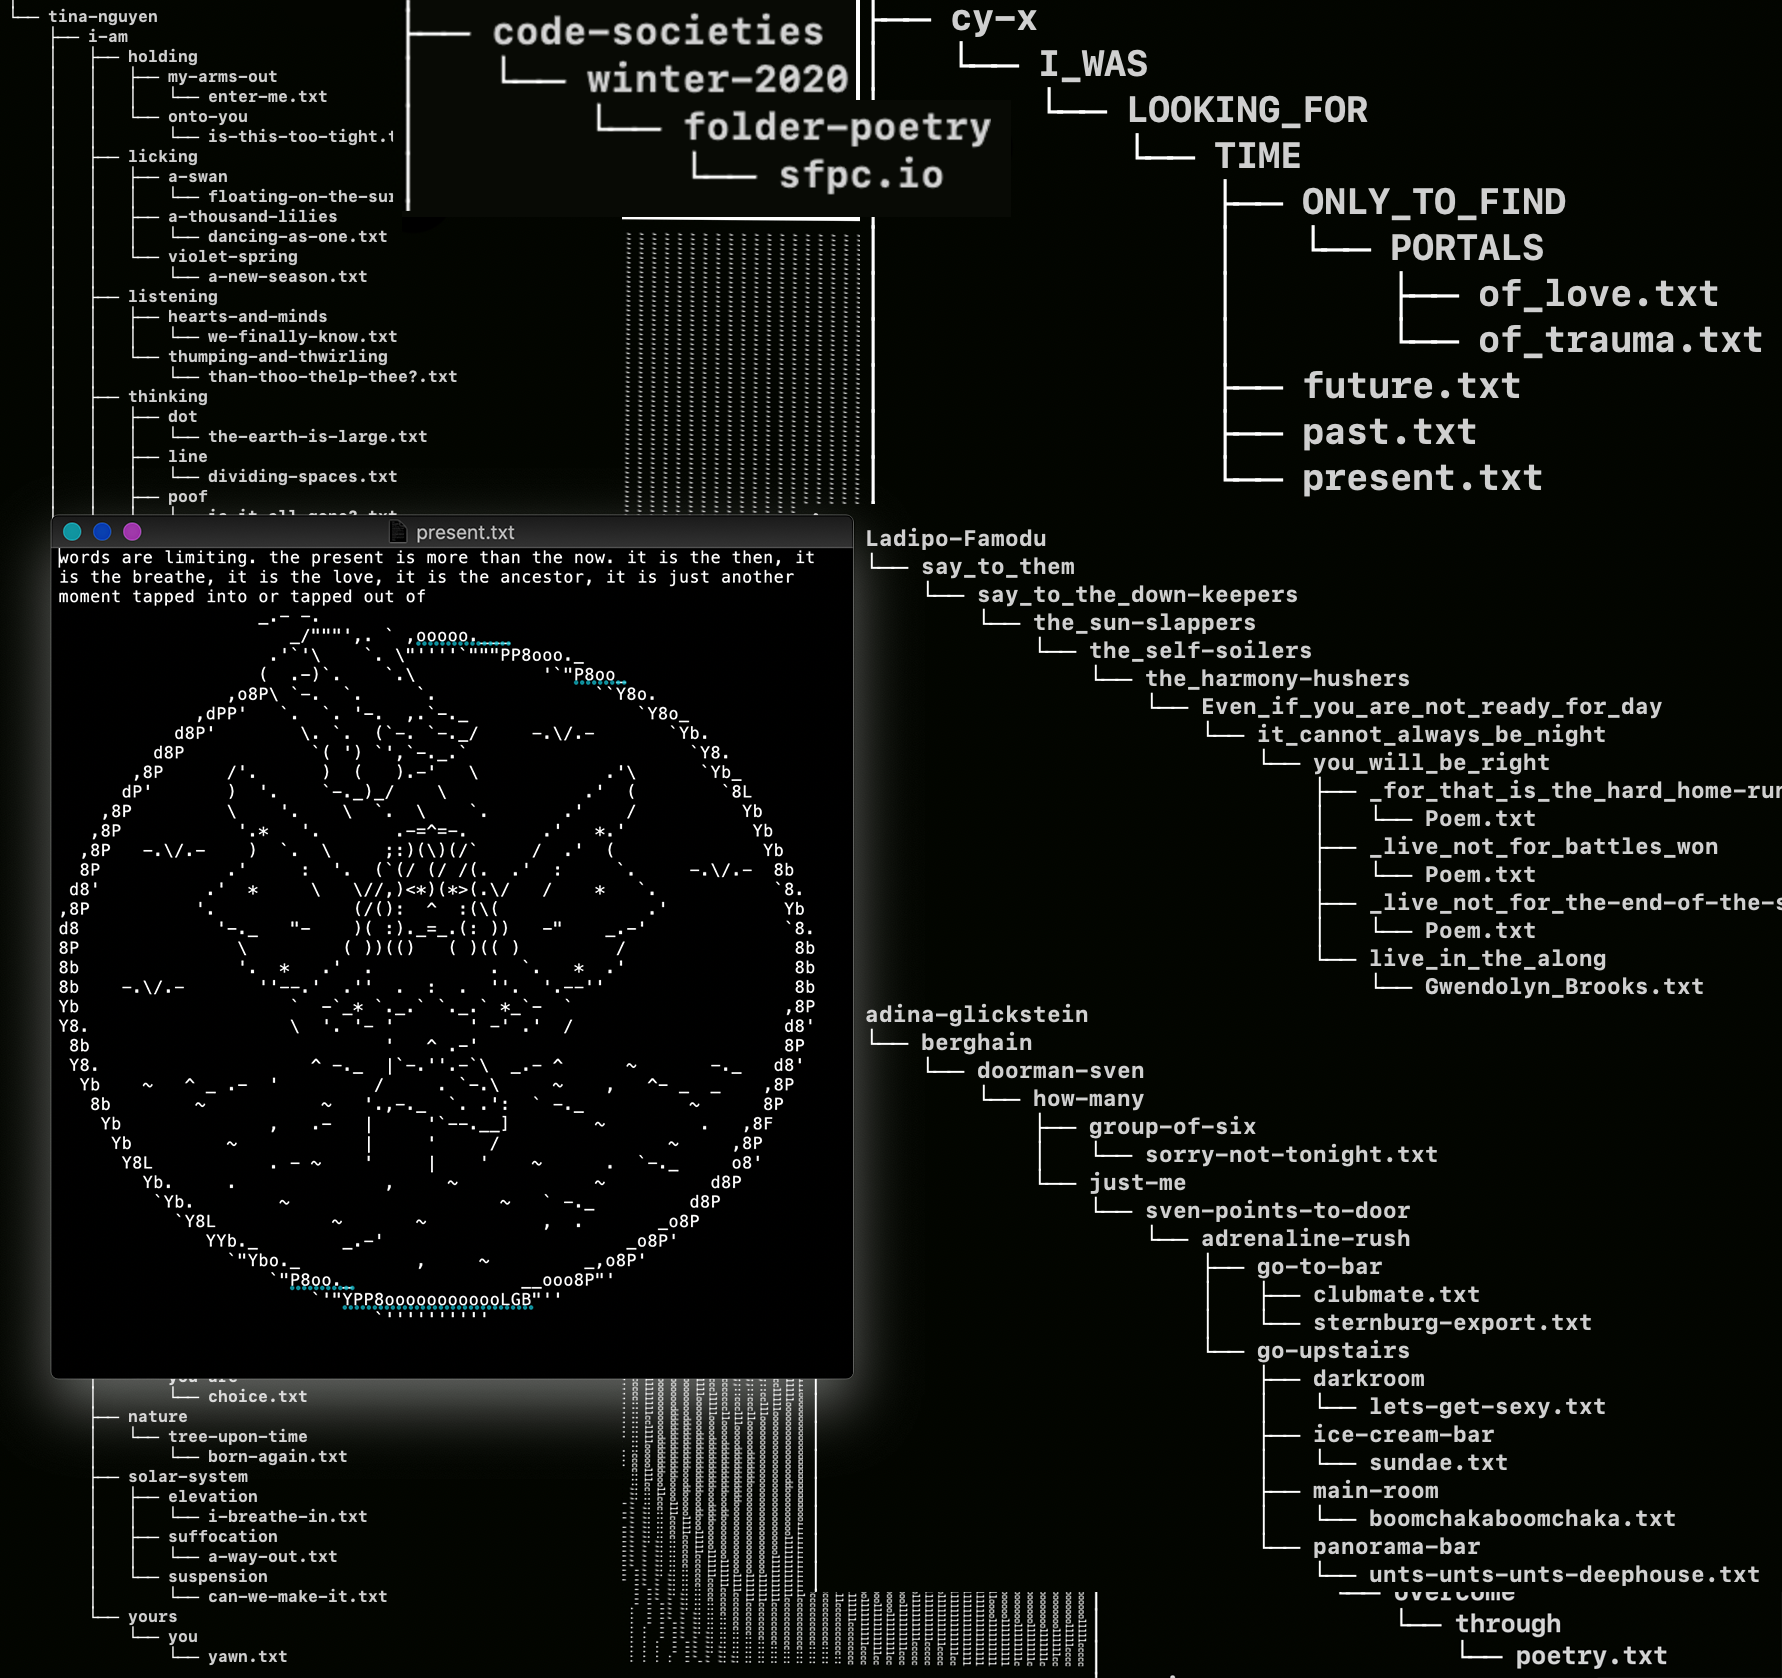
Many thanks to Melanie Hoff, and Digital Love Languages, which will be the guide for this introduction. (https://lovelanguages.melaniehoff.com/week-2-%e2%9c%a7-folder-poetry-2/).
Black Gooey Universe by American Artist (one of the readings assigned for week 2), is also a great reference for thinking about Terminal, GUIs and computer interfaces: https://static1.squarespace.com/static/59238d36d2b8575d127794a4/t/5a60bdecf9619a7f881b02a0/1516289526013/UNBAG_2_AmericanArtist.pdf
So lets hack our computer / re-introduce ourselves to computers / get started with terminal.
⚘⚘⚘⚘⚘⚘⚘⚘⚘⚘⚘⚘⚘⚘⚘⚘⚘⚘⚘⚘⚘⚘⚘⚘⚘⚘⚘⚘⚘⚘⚘⚘⚘⚘⚘⚘⚘⚘⚘⚘⚘⚘⚘⚘⚘⚘⚘⚘⚘
⚘⚘⚘⚘⚘⚘⚘⚘⚘⚘⚘⚘⚘⚘⚘⚘⚘⚘⚘⚘⚘⚘⚘⚘⚘⚘⚘⚘⚘⚘⚘⚘⚘⚘⚘⚘⚘⚘⚘⚘⚘⚘⚘⚘⚘⚘⚘⚘⚘
First we need to open Terminal, an application for using the command line.
On Mac:
- We'll use Iterm or the default Mac Terminal
- To open, press CMD + SPACE & search for iterm or terminal (it'll also be in your applications folder
- We will use bash instead of zsh if you are new to terminal. To switch from zsh to bash, enter the following line in your terminal:
chsh -s /bin/bash
On Windows:
- Follow these steps: https://stackoverflow.com/questions/42606837/how-do-i-use-bash-on-windows-from-the-visual-studio-code-integrated-terminal
- How to copy and paste a line in Git bash?
- Ctrl + Shift + C / V
On Linux:
- Depending on what flavor of linux you are using, things may vary. If you are using a Linux flavor with gnome, you can press the "windows" key and then type "term" and find the terminal. Possibly if you are using Linux you already know how to use the Terminal but I don't want to assume.
⚘⚘⚘⚘⚘⚘⚘⚘⚘⚘⚘⚘⚘⚘⚘⚘⚘⚘⚘⚘⚘⚘⚘⚘⚘⚘⚘⚘⚘⚘⚘⚘⚘⚘⚘⚘⚘⚘⚘⚘⚘⚘⚘⚘⚘⚘⚘⚘⚘
Now that Terminal is open, let's explore:
- Let's see who we are? type the bellow command and press enter. we'll do that for all of these following code blocks eventually
whoami
- let's check the weather just because…
curl wttr.in
Helpful Terms
https://gist.github.com/melaniehoff/158aeee648d006ffc278cc1e610d48b3#file-helpful-terms-md
⚘⚘⚘⚘⚘⚘⚘⚘⚘⚘⚘⚘⚘⚘⚘⚘⚘⚘⚘⚘⚘⚘⚘⚘⚘⚘⚘⚘⚘⚘⚘⚘⚘⚘⚘⚘⚘⚘⚘⚘⚘⚘⚘⚘⚘⚘⚘⚘⚘
⚠️Folder Poetry Best Practices⚠️
- all-lowercase-filenames-and-folder-names
- No spaces
- Use dashes or underscores. for example: my_file.txt or my-file.txt
⚘⚘⚘⚘⚘⚘⚘⚘⚘⚘⚘⚘⚘⚘⚘⚘⚘⚘⚘⚘⚘⚘⚘⚘⚘⚘⚘⚘⚘⚘⚘⚘⚘⚘⚘⚘⚘⚘⚘⚘⚘⚘⚘⚘⚘⚘⚘⚘⚘
Text Editor
In addition to a Terminal, it will also be helpful to have a simple text editor for making .txt files (the most basic text file format).
If you don't already have a text editor you like (e.g. VS Code, Vim, Atom), I recommend nano or Sublime.
nano is a very minimal text editor that you can use through terminal itself. to use nano, in terminal you type nano myfilethatiwanttoedit.txt and then you can edit the file in the terminal. When you are done making edits, you need to save and exit by pressing Ctrl+X and then pressing Y to confirm. After this, you will be returned to your terminal to wherever you were before you started using nano.
Sublime is a more feature-rich text editor, which runs as its own application. It comes with more useful features than nano, but will require installing it, configuring terminal so that you can open sublime from the terminal, and more jumping back and forth between terminal and sublime. If you want to use Sublime, you can download it here https://www.sublimetext.com/, and here is a guide for how to configure Sublime so it can be opened via the command line.
nano and sublime are both text editors and either one will work just fine for this tutorial.
Bash commands
https://gist.github.com/melaniehoff/32b14210b7ea6f605f625eabdf8b3968#file-bash-commands-md
⚘⚘⚘⚘⚘⚘⚘⚘⚘⚘⚘⚘⚘⚘⚘⚘⚘⚘⚘⚘⚘⚘⚘⚘⚘⚘⚘⚘⚘⚘⚘⚘⚘⚘⚘⚘⚘⚘⚘⚘⚘⚘⚘⚘⚘⚘⚘⚘⚘
The file ~/.bash_profile can be used to customize your terminal and add your own aliases (shortcuts).
- Open the file in your text editor, and start customizing (e.g.
subl ~/.bash_profile)
Here are some commands you could copy into your bash_profile (or invent your own).
# the below line changes your command prompt
# your command prompt is the first thing you see every time you open terminal and what appears before each of your commands. Change the emoji to yyoouurrrr emoji
export PS1="🍋 \w\n$ "


# handy aliases
alias d='cd ~/Desktop'
alias sp='source ~/.bash_profile'
alias bp='code ~/.bash_profile'
alias c='clear'
# shows hidden files
alias lh="ls -AF"

alias ty='for i in {1..5000}; do printf "  👋 🙌 THANK YOU 🙌 👋   "; done;'
alias swim='for i in {1..5000}; do printf "  swimmingly 🪸 🪼 🪸 🐬 🪸 💦 💧 💧 💧    "; done;'
alias heart='for i in {1..5000}; do printf "  ⚘ ⚔️ 💧 🫀 🩸    "; done;'
⚘⚘⚘⚘⚘⚘⚘⚘⚘⚘⚘⚘⚘⚘⚘⚘⚘⚘⚘⚘⚘⚘⚘⚘⚘⚘⚘⚘⚘⚘⚘⚘⚘⚘⚘⚘⚘⚘⚘⚘⚘⚘⚘⚘⚘⚘⚘⚘⚘
On Mac:
- Then we'll install Homebrew, software for macs that helps with installing open source software
- copy paste the below and press enter. you will see a lot of text and be asked to enter your password. you will be asked to enter y/n. enter y!
/bin/bash -c "$(curl -fsSL https://raw.githubusercontent.com/Homebrew/install/HEAD/install.sh)"
- then we'll use homebrew to install a software called "tree" that will help us visualize our poetry in tree like structures
brew install tree
- then you can run tree to visualize a directory structure in terminal
tree
⚘⚘⚘⚘⚘⚘⚘⚘⚘⚘⚘⚘⚘⚘⚘⚘⚘⚘⚘⚘⚘⚘⚘⚘⚘⚘⚘⚘⚘⚘⚘⚘⚘⚘⚘⚘⚘⚘⚘⚘⚘⚘⚘⚘⚘⚘⚘⚘⚘
With much appreciation to Melanie Hoff for the guides:
https://lovelanguages.melaniehoff.com/week-2-%e2%9c%a7-folder-poetry-2/
https://www.are.na/melanie-hoff/learning-gardens-code
And here is another beautiful Terminal reference from Taeyoon Choi:
And here is a guide into a longer deep-dive into folder poetry.
⚘⚘⚘⚘⚘⚘⚘⚘⚘⚘⚘⚘⚘⚘⚘⚘⚘⚘⚘⚘⚘⚘⚘⚘⚘⚘⚘⚘⚘⚘⚘⚘⚘⚘⚘⚘⚘⚘⚘⚘⚘⚘⚘⚘⚘⚘⚘⚘⚘
    ✺✺✺✺✺✺✺✺✺✺✺✺✺✺✺✺✺✺✺✺✺✺✺✺✺✺✺✺✺✺✺✺✺✺✺✺✺✺✺✺✺✺✺✺✺✺✺✺

      ✺✺✺✺✺✺✺✺✺✺✺✺✺✺✺✺✺✺✺✺✺✺✺✺✺✺✺✺✺✺✺✺✺✺✺✺✺✺✺✺✺✺✺✺✺✺✺

        ✺✺✺✺✺✺✺✺✺✺✺✺✺✺✺✺✺✺✺✺✺✺✺✺✺✺✺✺✺✺✺✺✺✺✺✺✺✺✺✺✺✺✺✺✺✺

          ✺✺✺✺✺✺✺✺✺✺✺✺✺✺✺✺✺✺✺✺✺✺✺✺✺✺✺✺✺✺✺✺✺✺✺✺✺✺✺✺✺✺✺✺✺

            ✺✺✺✺✺✺✺✺✺✺✺✺✺✺✺✺✺✺✺✺✺✺✺✺✺✺✺✺✺✺✺✺✺✺✺✺✺✺✺✺✺✺✺✺

              ✺✺✺✺✺✺✺✺✺✺✺✺✺✺✺✺✺✺✺✺✺✺✺✺✺✺✺✺✺✺✺✺✺✺✺✺✺✺✺✺✺✺✺

                ✺✺✺✺✺✺✺✺✺✺✺✺✺✺✺✺✺✺✺✺✺✺✺✺✺✺✺✺✺✺✺✺✺✺✺✺✺✺✺✺✺✺

                  ✺✺✺✺✺✺✺✺✺✺✺✺✺✺✺✺✺✺✺✺✺✺✺✺✺✺✺✺✺✺✺✺✺✺✺✺✺✺✺✺✺
                                      ⚘⚘
Assignment For Next Week
ssh into our class server and explore via terminal. decorate our virtual commune (by adding files and folders).
ssh visitor@commune.commoninternet.net
password: *********
More info about the assignment here.
Assignment: Virtual Commune
Our virtual commune is up and running in meghna's apartment and can be accessed via terminal with the following command:
ssh -p 2222 admin@mazhai.commoninternet.net
After running this command, you will be prompted for a password. The password is redacted
After entering the password, your terminal will now be ssh-ed into the raspberry pi in meghna's apartment. ssh is a protocol for remotely accessing another computer. alternatively you can imagine ssh as a form of astral projection. after running the ssh command, any commands you run in terminal will be executed on the pi instead of on your own laptop. You can always exit ssh by running the command exit which will return your terminal back to your own computer. Also note, if you open an additional terminal window, that will also be on your own computer — the ssh command just runs in a particular terminal window.
ssh is actually a very common tool for programmers — it is generally how people modify remote servers. We're just using it in a slightly unconventional way here to create a virtual commune, but its the same standard command.
Once you are ssh-ed onto the pi, you can explore by terminal. You can the run command help to show a short reminder of commands that you can run. You can also refer back to the "getting started with terminal" tutorial, and all the commands listed there will also work on the pi (other than the text editor Sublime). While using ssh, we recommend to use the text editor nano, which is a simple text editor that can be used within Terminal.
Explore, create files, create folders, decorate, as inspired. This is a collective ssh-based terminal commune larp. If you worked on the terminal art sidequest, please put your bash script in the gallery and make sure to give it the correct permissions to be runnable.
Setting Up Sublime Text
Based off of: https://www.sublimetext.com/docs/command_line.html
First install Sublime Text from https://www.sublimetext.com/
Sublime Text offers a command-line tool called subl that allows users to open files and projects directly from the terminal.
Setup Instructions:
- Windows:
- Locate
subl.exein the Sublime Text installation directory. - Add this directory to the system's
Pathenvironment variable to enable usage from the Command Prompt or PowerShell.
- Locate
- macOS:
-
Add subl to the PATH in ~/.bash_profile
-
For example, if Sublime Text is in the Applications folder, run:
echo 'export PATH="/Applications/Sublime Text.app/Contents/SharedSupport/bin/":$PATH' >> ~/.bash_profile -
and after that, open a new terminal window, and then you should be able to run:
subl, and it will open Sublime.\
-
Usage Examples:
-
Open a specific file:
subl filename.txt -
Open a directory as a project:
subl /path/to/project/ -
Open a new window:
subl -n -
Add a folder to the current window:
bash\
-
Use Sublime Text as the editor for commands like git commit:
export EDITOR='subl -w'
For a comprehensive list of options, run subl --help in the terminal.
Tutorial: Getting Started With Yunohost
Yunohost is a software to help people easily manage a server "for your friends, your association or your company".
Its an open source project, grant-funded, that started in France (so you will see a lot of french-first documentation of the project, but usually there are options to translate to English). Interestingly, there is a really strong French alternative technology movement which is an interesting contrast to the US Silicon Valley cultural trend. Chatons is another interesting and related French project: "CHATONS – kittens in french – is the Collective of Hosters Alternative, Transparent, Open, Neutral and Solidarity."
Because Yunohost intends to make it easy to setup and maintain your own server, the documentation is quite good, so we recommend to follow the Yunohost installation guide directly:
https://doc.yunohost.org/en/install
If your installation is successful, then on your laptop, when you are connected to the same WIFI as your server, you should be able to use your browser to visit the url http://yunohost.local, and see the yunohost admin interface for your server, that looks like this:
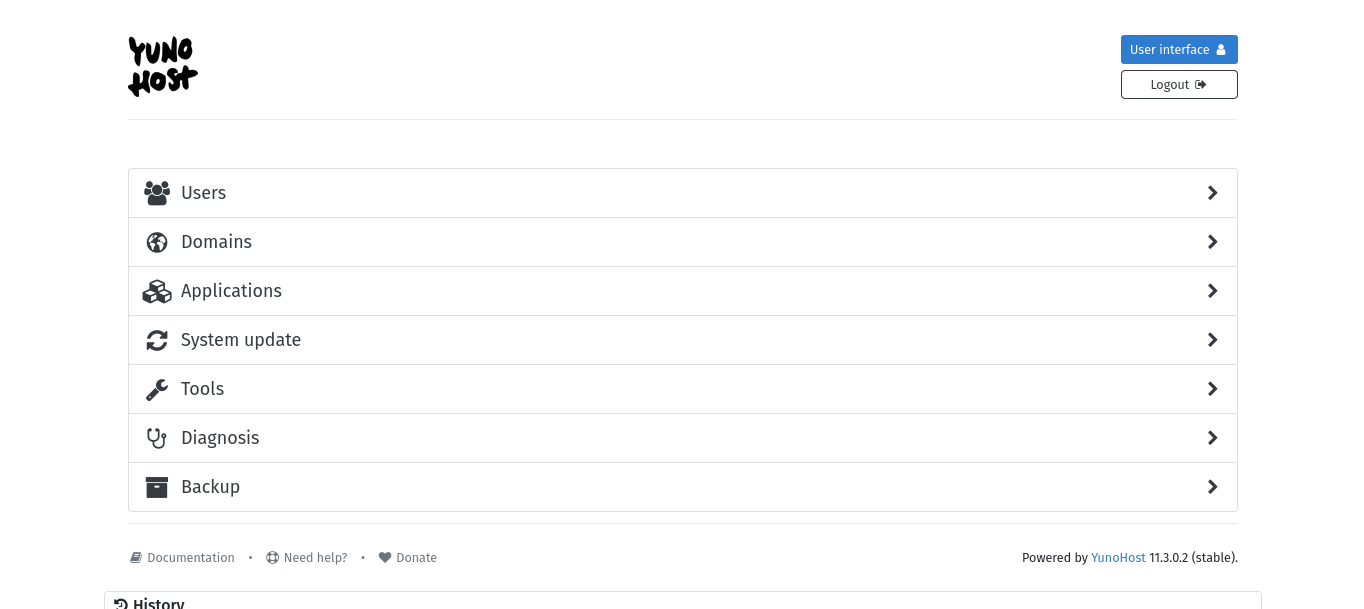
yunohost.local is a special local-only URL that yunohost creates that allows you to access it on your local network, even when yunohost is not yet visible on the public internet.
Sometimes, the installation will succeed, but the yunohost.local domain will still not be properly broadcast, and you need to look up the local IP address of your server directly. You can do this on the terminal, with a screen and keyboard attached to your server. In the terminal, after logging in, run the command ip a and this will show you the local IP address of your server. You can then enter this IP address directly into the URL bar of your browser, and it should also take you to the yunohost server admin interface.
⚘⚘⚘⚘⚘⚘⚘⚘⚘⚘⚘⚘⚘⚘⚘⚘⚘⚘⚘⚘⚘⚘⚘⚘⚘⚘⚘⚘⚘⚘⚘⚘⚘⚘⚘⚘⚘⚘⚘⚘⚘⚘⚘⚘⚘
In addition to the Yunohost written guide, I've also made a video tutorial if you prefer following along that way.
Here is a video tutorial on how to install Yunohost on a raspberry pi:
https://www.youtube.com/watch?v=LaHqJFJu3jI
If you didn't find hardware to practice using as a server for this class, you can also run Yunohost in "The Cloud".
Here is a video tutorial on how to install Yunohost using the cloud provider "Digital Ocean":
https://www.youtube.com/watch?v=NDcV8RqqXmE
Lastly, Yunohost themselves include some interesting documentation on the pros and cons and costs of running a server at home or in the cloud:
https://doc.yunohost.org/en/howtohostyourself
You can also refer back to the first tutorial on "Sourcing Hardware".
Our first goal is to just get Yunohost running and accessible from your local WIFI network. In future tutorials, we'll talk about installing applications and making your server visible to the public internet.
⚘⚘⚘⚘⚘⚘⚘⚘⚘⚘⚘⚘⚘⚘⚘⚘⚘⚘⚘⚘⚘⚘⚘⚘⚘⚘⚘⚘⚘⚘⚘⚘⚘⚘⚘⚘⚘⚘⚘⚘⚘⚘⚘⚘⚘
note: if you are installing Yunohost onto hardware that isn't a raspberry pi, there could be some other glitches or obstacles that come up. Its cool that Yunohost can potentially be installed onto so many different old computers, but different computer models also have unique issues that can lead to unexpected issues. Don't hesitate to reach out on Discord or in office hours and lets see what old computers we can bring back to life.
Tutorial: Installing Etherpad On A Local Server
This tutorial is intended to be used after successfully installing Yunohost onto your own server, so we are assuming you can already see the screenshot below on your local network, by visiting yunohost.local or the local IP address of your server (if you installed Yunohost on a server in the cloud, then follow this tutorial to install Etherpad in the cloud instead).
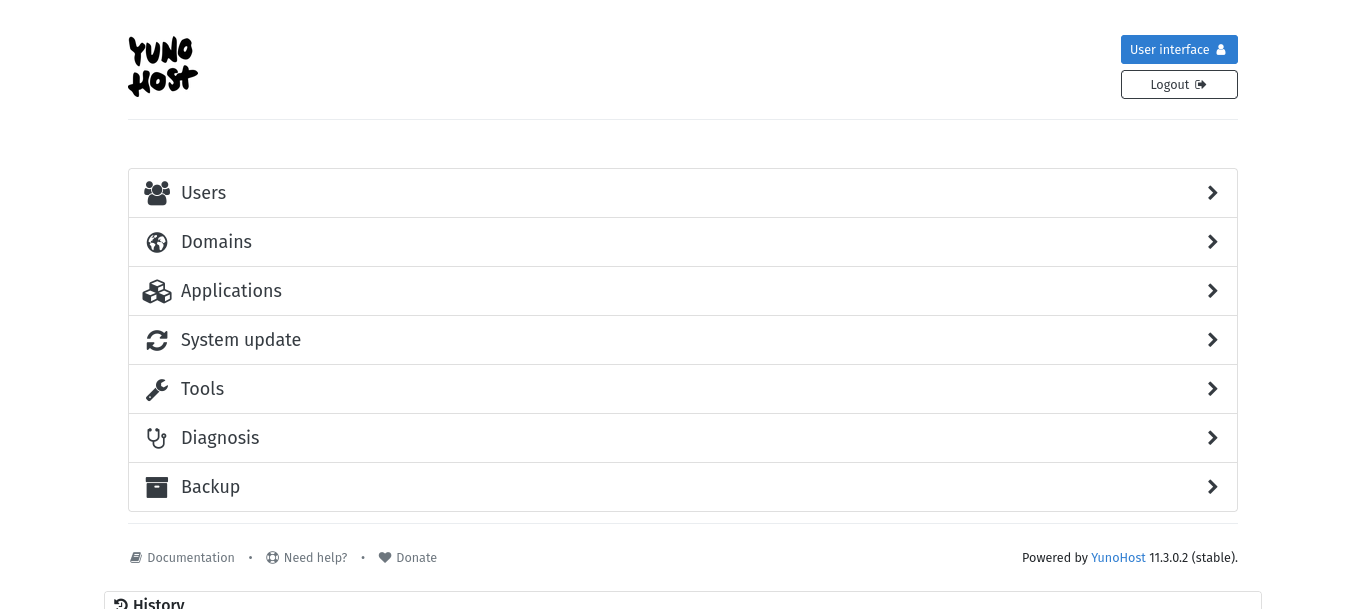
Yunohost mostly assumes that applications will be accessed via DNS (the domain system). This is fine for most use cases on the public internet, although we have to work around this if we want to use an application on our local network before putting it on the public internet.
So before installing an application, add a new domain in the Yunohost domains interface that we will use for your next application.
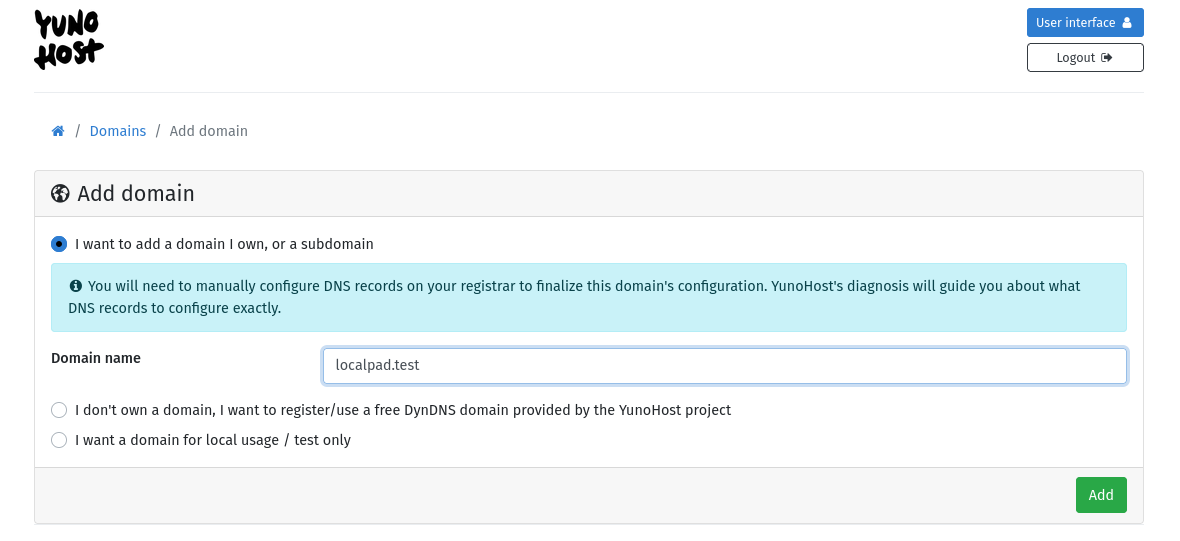 You can use whatever made up domain you want for this, you don't even have to actually own the domain.
You can even use a public domain you don't own like google.com (could be a fun experiment), since we are going to override it.
Don't worry if the "lets encrypt certificate" fails after creating the domain — we only have to worry about https certificates when we put an application on the public internet.
Now after creating the new domain, lets open Terminal on our laptop, and run nano /etc/hosts (you can also use sublime instead of nano, if you set up sublime, and prefer that).
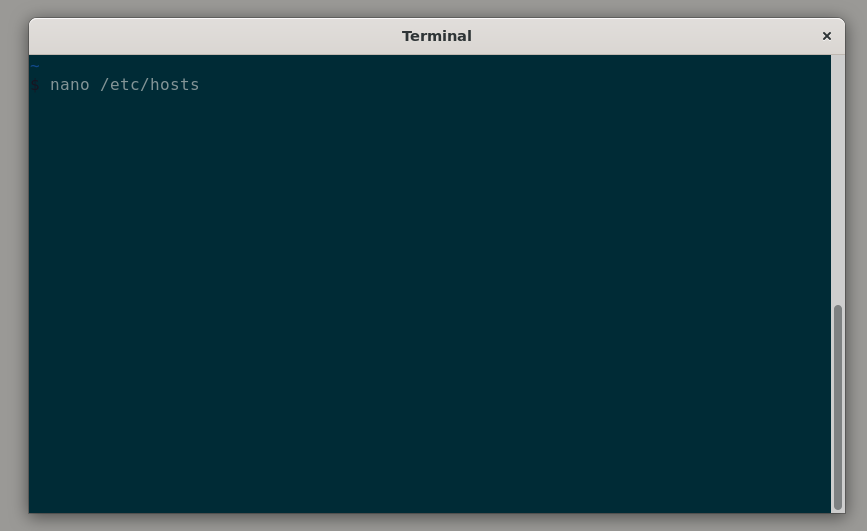
Then add a new line that looks something like this:
10.243.44.108 localpad.test
But instead of 10.243.44.108 use the local IP address of your server, and instead of localpad.test use whatever domain name you chose in the previous step.
/etc/hosts will then look something like this (although not exactly):
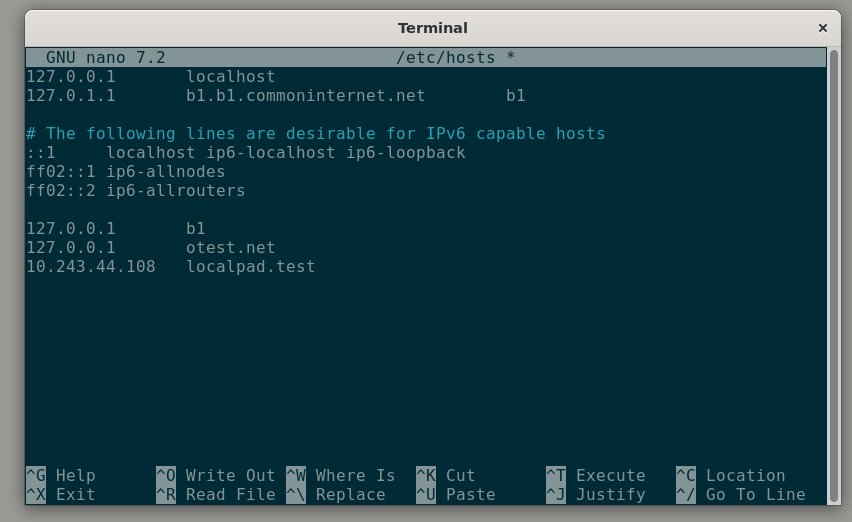
Now in your browser on your laptop, when you go to localpad.test (or whatever domain you chose) it should show the yunohost admin interface.
The file /etc/hosts is a special file which your computer checks for domain names before looking up a domain on the internet.
If you wanted, you could re-wire domains on your laptop to different things. For example, if you added the line:
10.243.44.108 google.com
then when you visit google.com, instead of going to google, it will take you to the server at that IP address.
Of course this just effects your laptop (not anyone else going to google.com).
⚘⚘⚘⚘⚘⚘⚘⚘⚘⚘⚘⚘⚘⚘⚘⚘⚘⚘⚘⚘⚘⚘⚘⚘⚘⚘⚘⚘⚘⚘⚘⚘⚘⚘⚘⚘⚘⚘⚘⚘⚘⚘⚘⚘⚘
Now that we have a special domain wired up just for our local network. Lets install an application there. Go into the "Applications" section of the Yunohost admin, and select "+ Install" and then search for Etherpad. This is the same way you can install other applications in Yunohost as well, but lets start with Etherpad since its a relatively simple application.
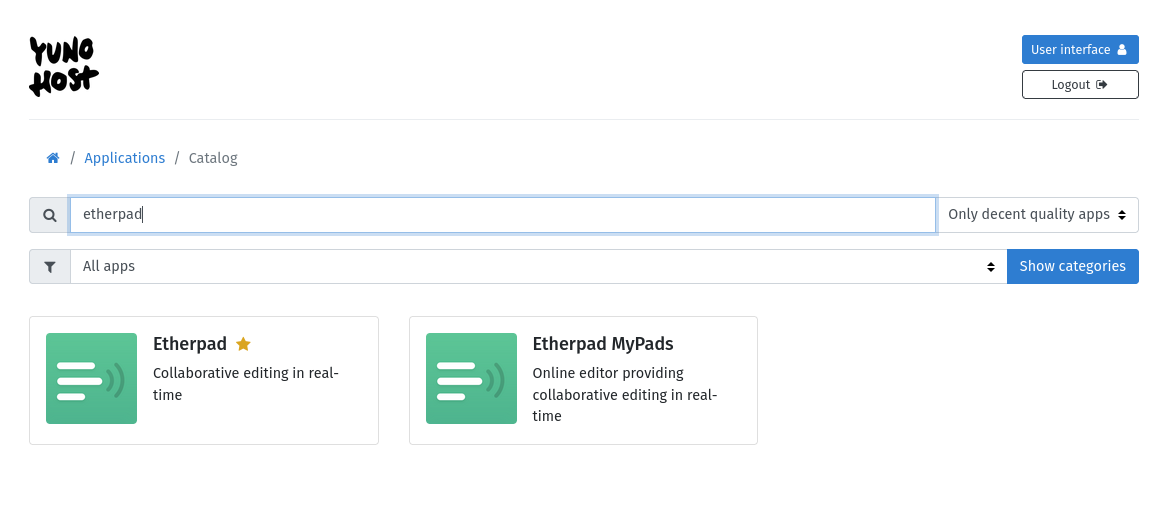 Select "Etherpad Mypads", then choose a set of install settings something like below (note: "Etherpad" should also be fine, but on my most recent testing, there was a bug in the "Etherpad" package and only "Etherpad MyPads" worked. They may fix the package in the future, but if you run into the same issue as me "Etherpad MyPads" may be the best option for now):
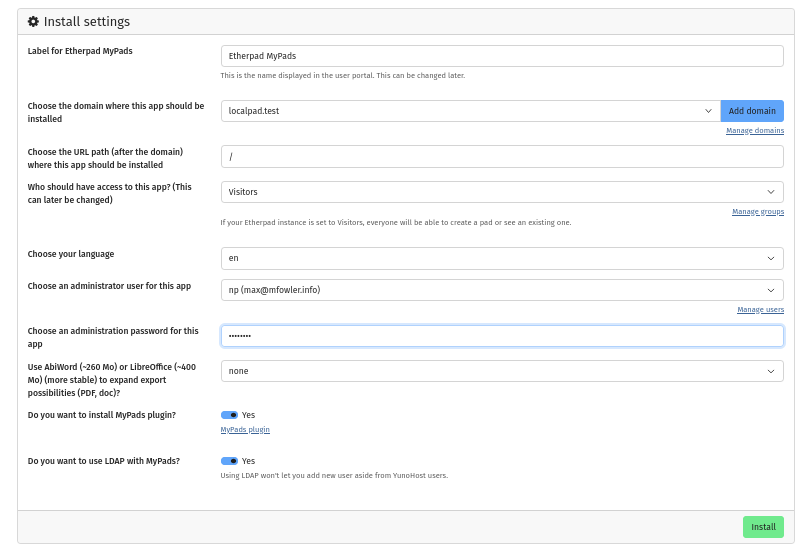
After clicking "Install" you may get a warning like "Are you sure you want to install this application on '/'? You will not be able to install any other app on [localpad.test]". This warning is true, but it is ok, and you can continue.
Sidenote on how to organize multiple applications installed on a server: when you install an application on the path '/' it is saying that this will be the only application installed on that domain. Alternatively, if you choose an installation location like '/myapp' than you will access the application via localpad.test/myapp and you could also install a second application on the same domain at the path /myotherapp which you would access via localpad.test/myotherapp. This is one way to organize things (by subpaths), but there are some apps which are not able to installed in this way, and need to be installed on '/' on their own domain just for them — so instead, I prefer to organize things so that each application has its own unique sub domain and is installed on '/' for that domain, and when I want to install multiple applications, I make a new subdomain for each application, e.g. the way it is organized on the class server:
-
pad.commoninternet.net —> etherpad
-
o.commoninternet.net —> outline
-
v.commoninternet.net —> peertube
/endofsidenote
If installation succeeded, you should see a message like this:
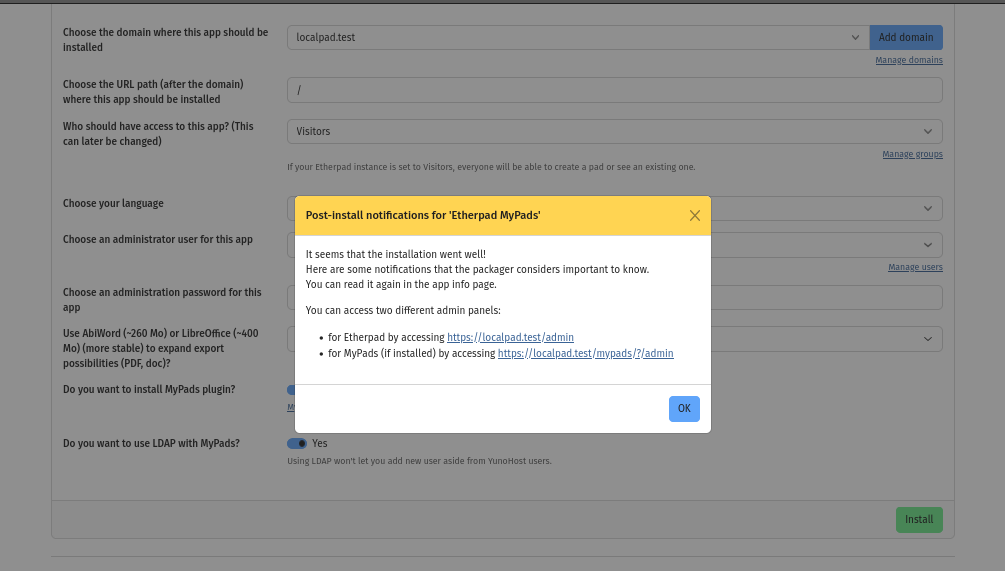
Although sometimes you don't see this message, but it still succeeded. In this case, refresh the page, and go to "Applications" and see if Etherpad is there now.
Now when you visit localpad.test in your browser (or your domain) you should see a warning that the https certificate is invalid. Click "Advanced" and "continue" or "ignore warning" and then it should take you to etherpad.
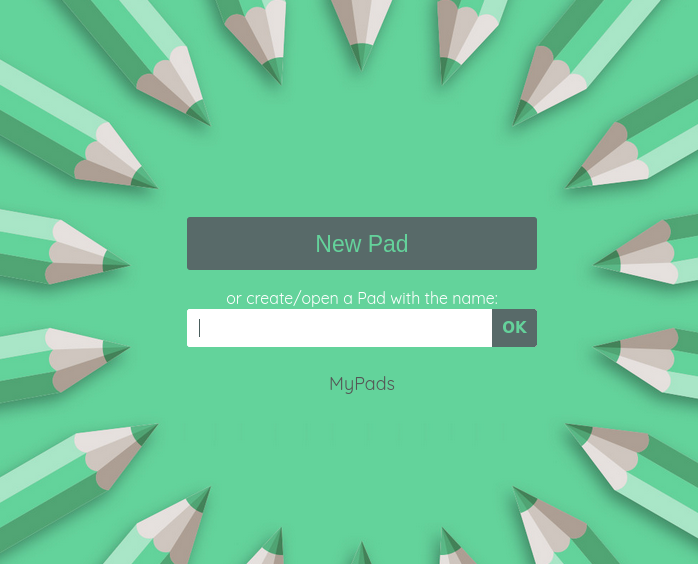
You now have a local instance of Etherpad running on your local network.
Congrats on getting your own local server running.
⚘⚘⚘⚘⚘⚘⚘⚘⚘⚘⚘⚘⚘⚘⚘⚘⚘⚘⚘⚘⚘⚘⚘⚘⚘⚘⚘⚘⚘⚘⚘⚘⚘⚘⚘⚘⚘⚘⚘⚘⚘⚘⚘⚘⚘
If Etherpad ran into errors while installing, you can try again, or also sanity check by trying installing some other simple applications such as Hedgedoc and Lichen-Markdown.
In future tutorials we will go over how to make your Yunohost applications visible to the public internet, as well as how to make your own website using Yunohost using hand-written HTML or Lichen-Markdown.
Tutorial: Installing Etherpad In The Cloud
This tutorial is intended to be used after successfully installing Yunohost onto a server in the cloud such as Digital Ocean. If you installed Yunohost onto a local server, follow this tutorial instead. If you haven't yet installed Yunohost on the cloud but want to, check out this video tutorial. Once you have have yunohost installed in the cloud, you can find the public IP address of your cloud server by going into your cloud provider web interface (such as Digital Ocean) and looking up the IP address of your server. When you visit that IP address and log in you should see this admin interface screenshotted below.
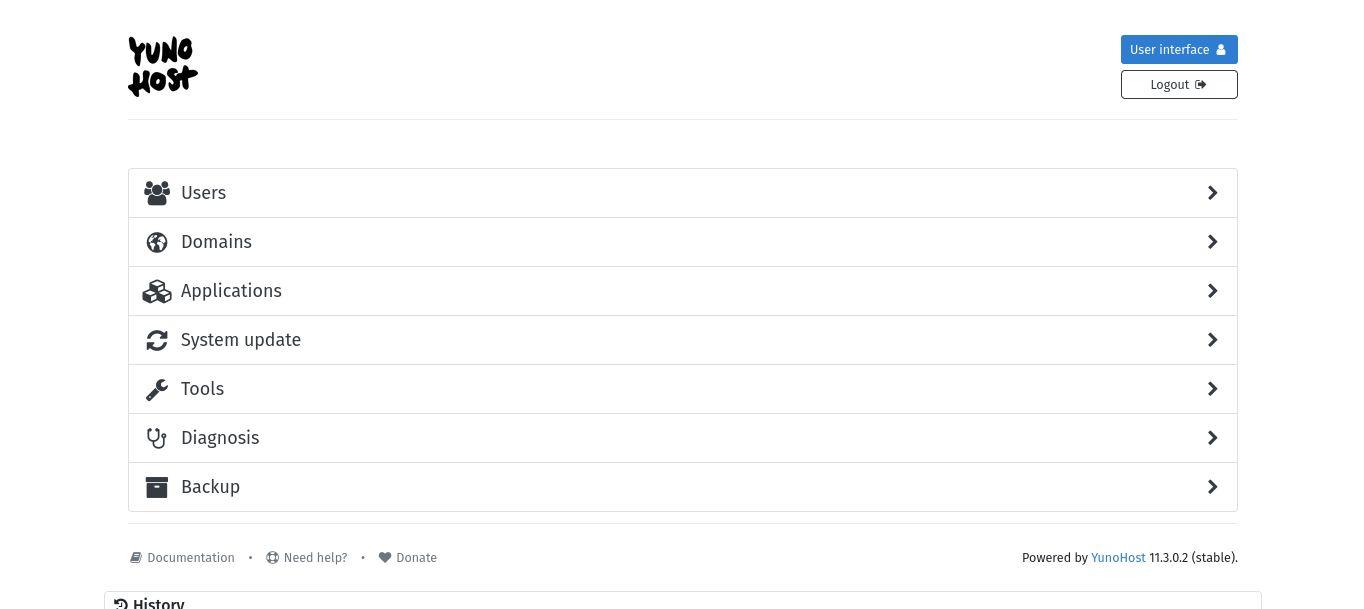
When you are first starting, the easiest way is to use a domain created by the Yunohost project, that looks something like mycutename.nohost.me .
If you haven't already created a domain like this for your, server, you can create one through the domains section of the yunohost admin interface.
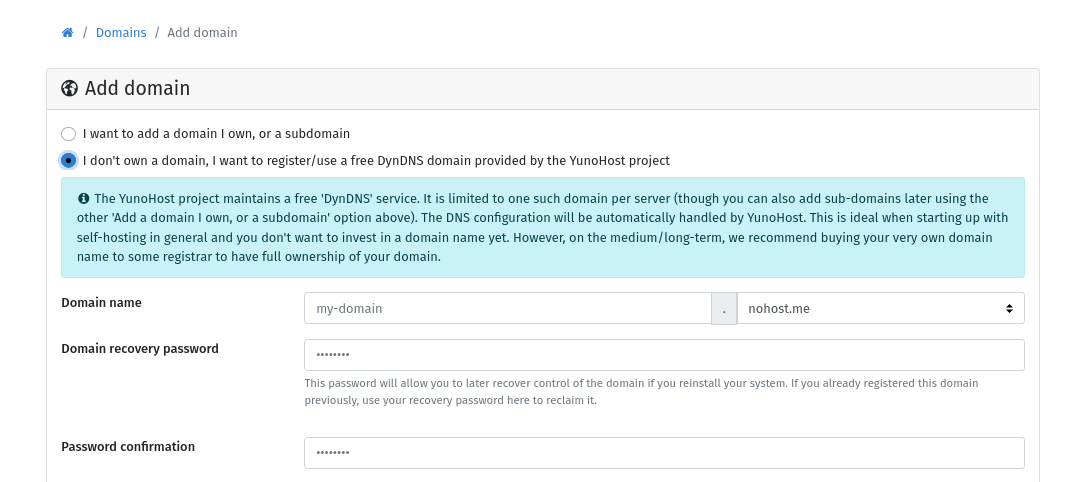
Once this domain is setup, you can then install an application on your Yunohost connected with that domain, and use that application through the public internet.
⚘⚘⚘⚘⚘⚘⚘⚘⚘⚘⚘⚘⚘⚘⚘⚘⚘⚘⚘⚘⚘⚘⚘⚘⚘⚘⚘⚘⚘⚘⚘⚘⚘⚘⚘⚘⚘⚘⚘⚘⚘⚘⚘⚘⚘
Go into the "Applications" section of the Yunohost admin, and select "+ Install" and then search for Etherpad. This is the same way you can install other applications in Yunohost as well, but lets start with Etherpad since its a relatively simple application.
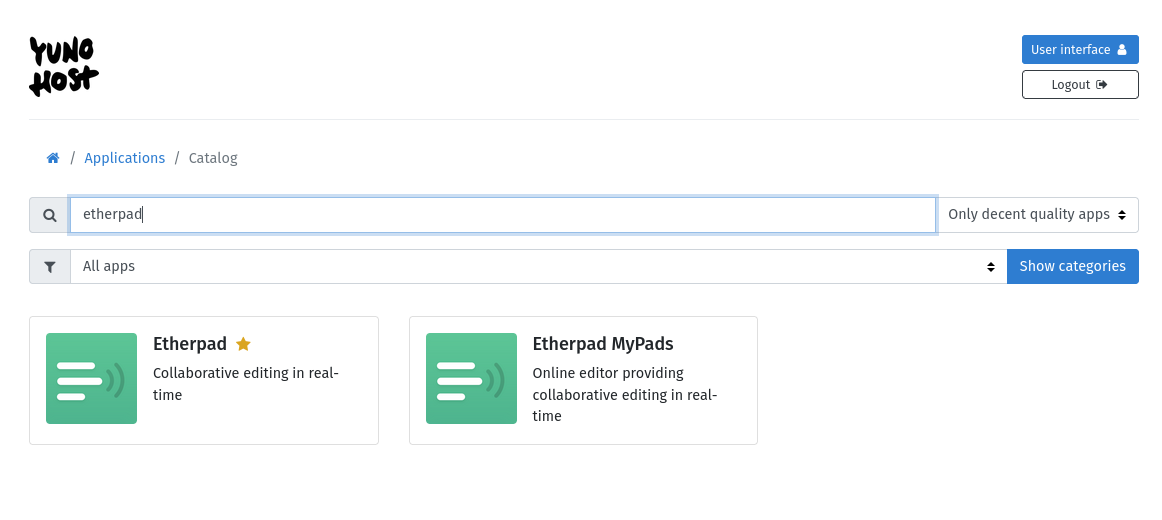 Select "Etherpad Mypads", then choose a set of install settings something like below (note: "Etherpad" should also be fine, but on my most recent testing, there was a bug in the "Etherpad" package and only "Etherpad MyPads" worked. They may fix the package in the future, but if you run into the same issue as me "Etherpad MyPads" may be the best option for now):
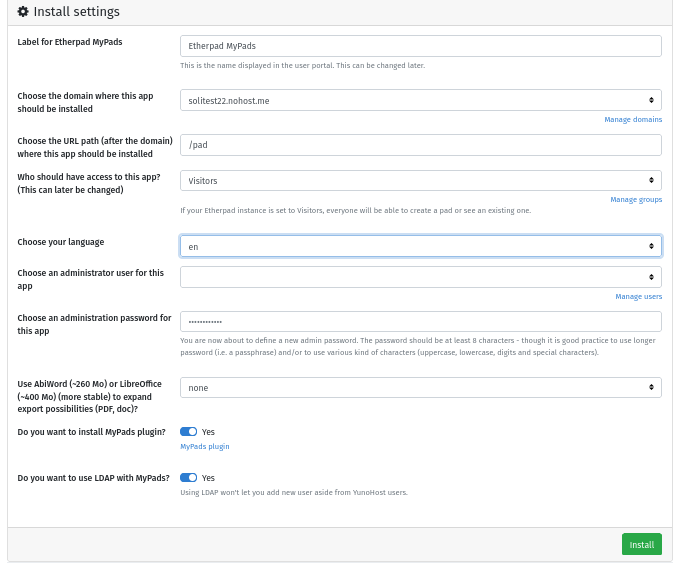
If installation succeeded, you should see a message like below.
Although sometimes you don't see this message, but it still succeeded. In this case, refresh the page after 5-10 minutes, and go to "Applications" and see if Etherpad is there now.
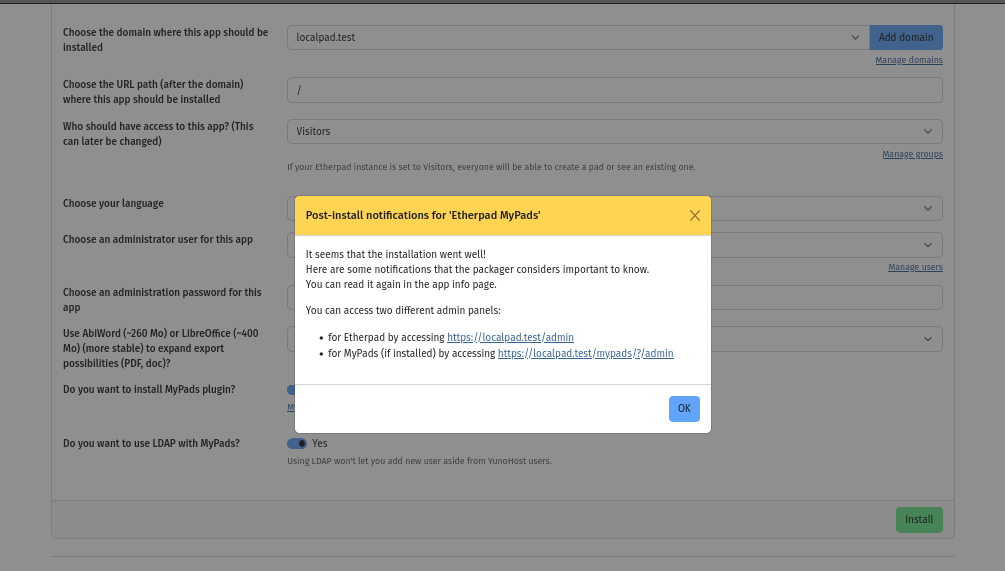
Now when you visit mycutename.nohost.me/pad in your browser (or your domain) you should see a warning that the https certificate is invalid. Click "Advanced" and "continue" or "ignore warning" and then it should take you to etherpad.
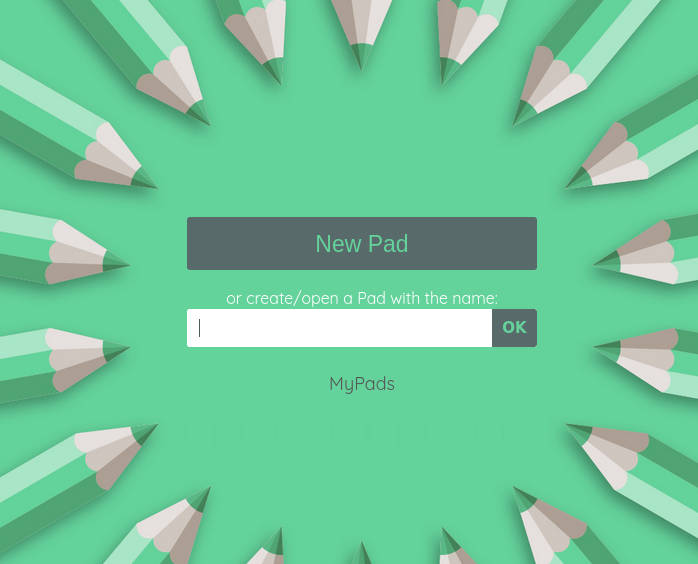
You now have an instance of Etherpad running on your server.
Congrats on getting your server running.
⚘⚘⚘⚘⚘⚘⚘⚘⚘⚘⚘⚘⚘⚘⚘⚘⚘⚘⚘⚘⚘⚘⚘⚘⚘⚘⚘⚘⚘⚘⚘⚘⚘⚘⚘⚘⚘⚘⚘⚘⚘⚘⚘⚘⚘
If Etherpad ran into errors while installing, you can try again, or also sanity check by trying installing some other simple applications such as Hedgedoc and Lichen-Markdown.
Note that lichen-markdown requires being installed on the root of a domain, not a subpath, so to install lichen-markdown you will need to make a new domain for it through the domain section of the admin interface before installing. For the new domain you make, you can make it a subdomain of your nohost domain, such as myapp.mycutename.nohost.me, or you can make a new domain configuration for a domain that you actually own and have registered at a DNS registrar somewhere (but this is more complicated). If you choose to go that route, a full guide on how to do DNS configuration for your own domain for Yunohost is here. Again note that you can make additional subdomains of mycutename.nohost.me without doing any additional DNS configuration.
Tutorial: SSH Into Your Server
In the first weeks of class, we experimented with accessing a "virtual commune" on a raspberry pi via the terminal, using SSH.
The way we accessed "the commune" can actually also be used to access our local servers (or cloud servers) and run commands on the terminal there.
Essentially there are two ways to perform admin and maintenance on a yunohost server:
- via the web admin interface, which can be accessed through the browser (via the IP address of the server, or a domain like yunohost.local)
- via the command line, which can be accessed by attaching a keyboard and monitor to your server, or via SSH (the subject of this wiki page)
To access your server via SSH, you need to first find the IP address of your server, and make sure your laptop is connected to the same router as your server (via wifi or ethernet). If your server is in the cloud you don't need to be on the same wifi because the server has a public IP address.
If your server is in the cloud, you can look up its IP address through the web interface of your cloud provider (e.g. Digital Ocean).
If you have a local server, and you have a monitor and keyboard attached to your server, the easiest way to find the IP address is by logging in, and running the command:
ip a
This will print out the IP address of each of the network interfaces of your server. Look for something like inet 147.182.177.135 (but with your IP address). In the rest of the guide, where this IP address appears, use your own IP address instead.
Once you have your IP address, you already know you can access the web admin interface via entering this IP address into the URL bar of your browser on your laptop.
You can also use this IP address to ssh into your server.
Open terminal on your laptop and run the following (but with your actual yunohost username instead of yourusername):
ssh yourusername@147.182.177.135
You will then be prompted to enter your password, after which, you will be logged into the terminal prompt of your server.
Run this command to see what yunohost commands you can run from the command line:
yunohost --help
You can also always reboot your server in this way too (sometimes helpful if it reaches a weird frozen state). Try this out to reboot your server (note this will also temporarily kick you out from SSH because as the server reboots, your ssh session will be logged out):
sudo reboot now
Now that you have SSH access to your server, you can now follow the guide to setting up a tunnel on your server.
This SSH access can be a helpful fallback in case:
- the yunohost web admin interface ever stops working and you need to debug why
- you want to do something more advanced or specific that can't be done through the web interface (via the terminal there is no limit to what you can do with your server, even installing software completely outside of the scope of yunohost)
The full yunohost guide on using SSH and yunohost admin from the command line is here.
How To Find The IP Address Of Your Server Using arp-scan
To find the IP address of your Raspberry Pi on your local network using arp-scan on your MacBook, follow these steps:
Step 1: Install arp-scan
arp-scan is not installed by default on macOS, but you can install it via Homebrew. If you don't have Homebrew installed yet, follow the instructions here.
brew install arp-scan
Step 2: Find Your Network Interface
To see which network interface you're using (like en0 or en1), run:
ifconfig
Look for an interface with an IP address in the range of your local network (e.g., 192.168.x.x)
Step 3: Use arp-scan
Run arp-scan on the appropriate network interface. If your network interface is en0 and your network IP range is 192.168.1.0/24
the command would look like this:
sudo arp-scan --interface=en0 192.168.1.0/24
- Replace en0 with the correct network interface.
- Adjust the IP range to match your network if necessary.
Step 4: Identify the Raspberry Pi
Look for a device listed as Raspberry Pi in the output. It should show the IP address, MAC address, and vendor.
Tutorial: Tunnels
This tutorial is expected to be followed after installing Yunohost onto your own server, and getting an application installed via Yunohost. If you installed Yunohost in the cloud, then you don't need to follow this tutorial (because cloud servers are already on the public internet).
Now you have a local server, but its not visible on the internet yet.
The first thing is to remember "The Internet" is a network of networks. When your local server is connected to the local wifi (or via an ethernet cable) it is visible on the local network, which includes other devices connected to the same wifi, but is not yet visible to devices on other networks (connected to other WIFI or access points).
The diagram below shows two different "home networks" connecting to the internet. Each "home network" is its own local network.
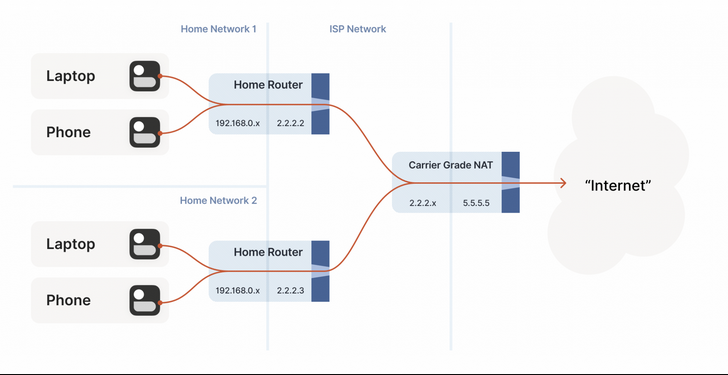
Some people consider this a sort of design flaw of the internet — but there are pros and cons. On the positive side, it makes it slightly easier to secure the local network (as connections from other networks require special provisions). On the negative side, it makes it more difficult to build fully peer-to-peer apps or to run home servers, although not impossible, and there are a wide range of ways around this, that let a computer from one local network communicate directly with a computer on another local network.
This guide will go over some of these methods, specifically in the context of self-hosting. NAT Traversal (https://en.wikipedia.org/wiki/NAT_traversal) and NAT Hole-Punching (https://en.wikipedia.org/wiki/Hole_punching_(networking)) are two related technical terms for these rabbit holes.
⚘⚘⚘⚘⚘⚘⚘⚘⚘⚘⚘⚘⚘⚘⚘⚘⚘⚘⚘⚘⚘⚘⚘⚘⚘⚘⚘⚘⚘⚘⚘⚘⚘⚘⚘⚘⚘⚘⚘⚘⚘⚘⚘⚘⚘⚘⚘⚘⚘
Method One: Port Forwarding
This was the method used in Season One Of Solidarity Infrastructures, and it works, but it requires access to your router, and has some positives and negatives.
On the positive side, if you have access to your router, you can set up port forwarding without messing with routing through any computers any where else (which other solutions listed here require). This is a form of autonomy that could be useful.
Yunohost provides a guide for how to setup port forwarding here.
On the negative side:
- every router is different, and so it is hard to write a guide that works for all routers
- based on living situation, not everyone has access to their router, or the admin interface for their router (which is required for configuring port forwarding)
- if you forward a port on your router, this is one less security protection for your local network. note, having an open port on your router is not itself a security vulnerability (and I've done this many times) — but many things in computer security work by sort of piling on layers of extra protection, in case some other layer of protection breaks. so opening a port is one small protection guard removed.
- when you use port forwarding from your home router, the IP address of your home router is visible to folks who access your home server
For all of these reasons, I spent some time looking into alternative ways to make your server visible to the public internet, that don't require changing any configurations on your router. The alternative method I've found that doesn't require port forwarding and is working the best so far is using Tunnels (aka a VPN) and is described in the next section.
⚘⚘⚘⚘⚘⚘⚘⚘⚘⚘⚘⚘⚘⚘⚘⚘⚘⚘⚘⚘⚘⚘⚘⚘⚘⚘⚘⚘⚘⚘⚘⚘⚘⚘⚘⚘⚘⚘⚘⚘⚘⚘⚘⚘⚘⚘⚘⚘⚘
Method Two: Tunnels With Tailscale
Tailscale is one of the most popular overlay networks (Zerotier is another popular one). Both of these tools let you add different devices (aka computers) to a virtual network. All of the devices that are added to the virtual network can then interact with each other as though they were on the same local network.
In the background, a virtual network uses tunnels to connect the different computers. Interestingly, on a network level, a tunnel appears exactly like an ethernet cable — so to your operating system a virtual network appears the same as though you had connected all of these computers in different places with giant ethernet cables.
To setup a tailscale tunnel with your server, login to the terminal of your server (using a monitor, or using SSH from your laptop via this guide), then run the following command on your server terminal to install tailscale and connect to the gateway co-op tailscale network:
curl -fsSL https://tailscale.com/install.sh | sh && sudo tailscale up --auth-key=<redacted>
Note that the auth key in the previous command is a secret password that connects you to the gateway co-op tailscale network, so please don't post this command publicly or share it with others outside of the class.
After running this command, for reasons that are currently unknown to max, sometimes its necessary to run the second part again:
sudo tailscale up --auth-key=<redacted>
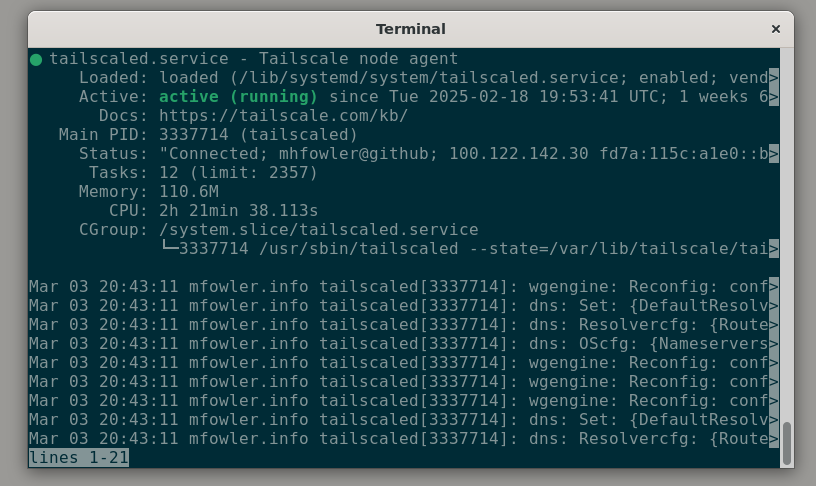
You can then confirm tailscale is now running by running this command that checks the status of a running service, and looking for green letters that say 'active (running)':
sudo systemctl status tailscaled
Note the d at the end of tailscaled in the command above (for some reason the systemd process for tailscale is called tailscaled).
You should then see something like this (and then you just need to press q to exit this screen and return to the terminal prompt):
Lastly, run the following command, which returns the IP address of your new private tailscale tunnel on the class tunnel network. Then we just need to tell the tunnel-gateway-server to forward requests from a particular domain to your tunnel IP. Here is the command to get the IP address of your tunnel:
sudo tailscale ip
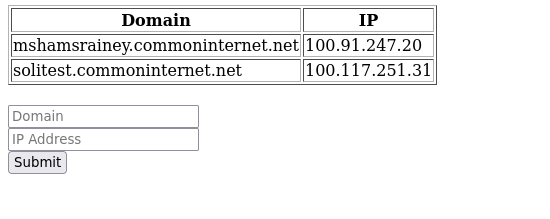
To register your IP address with the tunnel-gateway-server, you then need to navigate to https://g1.commoninternet.net/admin/.
Login with the the username ==redacted== and the password ==redacted== . you can then use the form on that page to register a new subdomain of commoninternet.net to point to your tunnel IP address. you can also use this form to update the IP address that a subdomain is registered to if you need to.
advanced usecase: you can also register your own domains here that you own as well and it will also work, you just need to ensure through your own domain registrar that your domain has an A record which points to the IP address of the tunnel gateway server (143.244.213.108), and then also register your custom domain-to-tunnel mappings on the tunnel gateway in the same way.
The gateway web admin interface looks something like this:
After wiring up a domain (using either method) to point to your tunnel IP address, you also need to add this domain to your yunohost server admin, via the yunohost admin domain interface (via yunohost.local or however you access your yunohost server admin interface).
Finally, now if you install an application on your yunohost server at the domain you connected with your tunnel (e.g. yourname.commoninternet.net), you should be able to see your local yunohost application running on your local server through the public internet from anywhere in the world with an internet connection by visiting yourname.commoninternet.net in the browser.
🌐
Content warning: more technical explanation follows:
On a more technical level, the domain commoninternet.net actually points to a Digital Ocean VPS in the cloud, which is also a member of the gateway co-op tailscale network. This VPS receives requests to commoninternet.net and then forwards them to your local device via the tailscale tunnel, using a reverse proxy. It's kind of a mouthful — another way to say it would be there is a server in the cloud which is already visible on the public internet, and it receives requests and forwards them to your local server via the tailscale virtual network (which it is also a member of).
Setting up a virtual gateway server like this is kind of complicated, and wouldn't be recommended if you are just getting started with self-hosting. But if you have a friend who is already running a gateway (which you do), this is an easy way to get your local server visible to the public internet. If their gateway goes down, or you want to be even more independent, you can always switch to using port forwarding instead. All your data still lives on your device, the cloud server is just a gateway that proxies requests (which also has the benefit of hiding your local IP address from the public, and not requiring you to alter your home router configuration in any way).
It is also possible to later switch to one of the other methods of getting your server on the internet, such as cloudflare tunnel, or ngrok.
⚘⚘⚘⚘⚘⚘⚘⚘⚘⚘⚘⚘⚘⚘⚘⚘⚘⚘⚘⚘⚘⚘⚘⚘⚘⚘⚘⚘⚘⚘⚘⚘⚘⚘⚘⚘⚘⚘⚘⚘⚘⚘⚘⚘⚘⚘⚘⚘⚘
Method Three: Ngrok
Ngrok is a proprietary tool for remotely accessing a computer. It may have other use-cases now too, but that's what I always used it for.
You can use ngrok to create a tunnel, which lets you communicate with the computer being tunneled to as though you were on the same local network. It uses Ngrok-the-company's servers as an intermediary, and the free-plan has some limitations, but its still a practical and easy way to quickly make a tunnel so you can access a server from afar.
Instructions for how to install ngrok are here: https://download.ngrok.com/downloads/linux
After installing ngrok, on your local server you can then run:
ngrok tcp 22
which will output an address you can use to ssh into your server remotely.
⚘⚘⚘⚘⚘⚘⚘⚘⚘⚘⚘⚘⚘⚘⚘⚘⚘⚘⚘⚘⚘⚘⚘⚘⚘⚘⚘⚘⚘⚘⚘⚘⚘⚘⚘⚘⚘⚘⚘⚘⚘⚘⚘⚘⚘⚘⚘⚘⚘
Method Four: Zerotier
Zerotier is one of the most popular overlay networks (and is an alternative to Tailscale).
Instructions for installing Zerotier on Linux are here: https://www.zerotier.com/download/#entry-5 (Yunohost runs on Linux, so this is the same for installing Zerotier on Yunohost).
You should then be able to run zerotier with the following command:
sudo zerotier-one
You can then run the following command to join a zerotier network:
zerotier-cli join <NETWORK_ID>
In the end I decided to switch to Tailscale instead of Zerotier as a recommendation because I was running into some bugginess with Zerotier tunnels and Zerotier also has a limit on the number of devices you can connect to a network on the free plan, where as with the self-hosted version of Tailscale there is no limit.
FAQ Yunohost Common Issues
This page of a collection of common issues that people run into in this class when getting started with Yunohost.
Using The Yunohost Diagnosis
The yunohost official installation guide, provides the guidance below on using the Yunohost diagnosis, but in this class we follow a couple steps that are different than the standard installation and so we need to use the initial diagnosis a little differently.
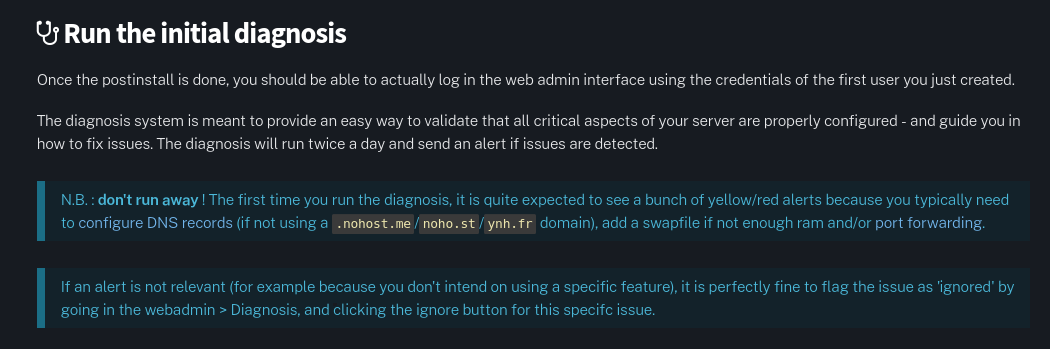
If you are running yuonohost in the cloud, then you can use the diagnosis in just the way they suggest (and if things are working properly, it should be pretty straightforward to get "green" for all the critical diagnosis items).
If you are running yunohost locally, and you decide to set-up port forwarding for public internet access, then you can also use the diagnosis in the standard way (as port-forwarding is the standard way yunohost expects you to configure a local server to be visible on the public internet).
However, as described in the tunnels tutorial, in this class we are also exploring a way to make local servers visible on the public internet using tunnels (a non-standard-to-yunohost approach). With the tunnels approach, we can completely ignore the section of warnings in the diagnosis about tunnels as well as about ports, both of which are not relevant. Similarly, when we are modifying /etc/hosts to setup apps to be run purely on the local network (tutorial here), this is also a non-standard-yunohost-usage and we can also ignore the diagnosis section about DNS records and ports. Similarly, in the case of using /etc/hosts or tunnels, we don't need to worry about https configuration (this is handled on the tunnel gateway for now).
Lastly, mostly in this class we are ignoring the functionality of Yunohost as an e-mail server. So we can ignore the warnings about e-mail configurations. If you want to explore yunohost as an e-mail server, more info is here, although be warned, as I've written about in this blog post, its difficult to self-host an e-mail server and not end up in people's spam folders, unless you setup an SMTP relay through another e-mail provider which is somewhat of an advanced usecase (a guide is here).
Installing Yunohost In The Cloud Vs On A Local Server
a few folks ran into into issues this year about confusion between local and cloud setups. there are many similarities, but also some differences. the key thing is that a local server is not initially visible on the public internet, so some extra steps are needed to do that, and there are some ways of accessing a local server (through the local network) that are not possible with a remote server. with a remote/cloud server, of course you are not actually on the same wifi/local-network, so none of the instructions related to that apply.
I have now made two tutorials for installing etherpad, one for a local server, and one for the cloud, so hopefully that clears up some of the confusion.
Tunnel Gateway Sends Me To Yunohost Login?
after following the tunnels tutorial, some folks ran into the issue that their subdomain appears on gateway.commoninternet.net but when they visit their domain (e.g. cookielink.commoninternet.net), it takes them to a yunohost login page which does not accept their username or password. This is most likely because for the tunnel to work, an application needs to be installed and running on your homeserver with the domain you registered on the tunnel gateway. If no application is installed on your homeserver with that domain, then the tunnel gateway will redirect the visitor to its own yunohost login (which has a different username and password) — this is kind of a weird quirk but for now the solution is just make sure you have an application installed at the tunneled domain (like etherpad or lichen-markdown or something else), which is what you will want eventually anyway.
How Long Does It Take To Install Etherpad?
most of the time it will be pretty quick, a few minutes, and then show a success message when its done. but sometimes the connection hangs while its installing, so it will just appear to be installing forever even though it actually worked. If there's no sign of life for more than five or ten minutes, than you can just refresh the page, and go to the "Applications" section of Yunohost and you should see there that Etherpad is installed (if it worked).
Tutorial: Permacomputing & Lichen-Markdown
Lichen-Markdown is a permacomputing CMS (content management system) — or in slightly less jargony language, its a simple tool for making websites.
Permacomputing is a topic that I love, for its approach to software, its aeshetics, and the combination.

One nice definition of Permacomputing according to Fiber Space:
"Said with tongue in cheek, permacomputing is a radically slightly more sustainable approach to computer and network technology inspired by permaculture. It is both a concept and a small nascent community of practice-oriented around issues of resilience and regenerativity in digital technology derived, among others, from permaculture principles. In a time where computing epitomises industrial waste, permacomputing encourages the maximising of hardware lifespans, minimising energy use and focussing on the use of already available computational resources."
You can read more about permacomputing in some of these places:
- http://permacomputing.net/ — a permacomputing wiki
- a newsletter I wrote titled "Permacomputing & Infinite Time"
- Permacomputing Aesthetics: Potential and Limits of Constraints in Computational Art, Design and Culture (a paper by Brendan Howell et al.)
- Hannah Gmeiner on Permacomputing in Graphic Design
- Berlin Permacomputing Meetup
- The Lo-Fi Art and Human Tools Era
I (max) started working on lichen-markdown three years ago with @abekonge, a friend from solpunk, through a discussion on Scuttlebutt where a friend named @soapdog helped fork the codebase of the original lichen project, to make it work with markdown instead of gemini.
Gemini is a more minimal alternative to HTML, and is also an interesting permacomputing project in its own right. The original lichen was a CMS that uses gemini as its markup language (the format that content is written in). However, gemini is so minimal, that it can be too restrictive for a lot of contexts — for instance, gemini has no notion of inline-links (like this), and all links need to appear on their own line. Like below:
https://www.joedolson.com/2006/05/inline-links-for-usability/
Markdown is a more flexible markup language, that allows for inline links, as well as some other features. Markdown is also very commonly used, recently even being adopted by Microsoft Word (https://ppc.land/microsoft-expands-markdown-ecosystem-with-new-document-conversion-tool/).
Many CMS and tools for making websites support writing pages and posts in Markdown. HTML and CSS are useful when you need to have full control over how a page is styled, but if you already know what style the page should be in, and just want to add new pages or more content, its easier to write the content in a simpler format like Markdown.
In another tutorial, we will go over how to self-host a website with Yunohost with hand-written pure HTML which is also a great approach, but we're starting with Lichen-Markdown because its an easy way to get started self-publishing, and it also has "preview" functionality built-in that lets you make changes and see what they look like (similar to other tools for learning programming, like glitch).
Lichen-Markdown is a CMS, of which there are many others (like Datenstrom Yellow, ProcessWire, Wordpress and Kirby), but it tries to be as simple as possible. For a complicated website, this could be limiting and another tool might be better, but for simple websites it can actually be nice and mentally relaxing to have fewer features. I've written some more thoughts about simplicity and permacomputing business models here, and you can also read more about Lichen-Markdown on its website.
Now with all that intro, how do you actually use it?
⚘⚘⚘⚘⚘⚘⚘⚘⚘⚘⚘⚘⚘⚘⚘⚘⚘⚘⚘⚘⚘⚘⚘⚘⚘⚘⚘⚘⚘⚘⚘⚘⚘⚘⚘⚘⚘⚘⚘⚘⚘⚘⚘⚘⚘
Lichen-Markdown has a yunohost package, so you can easily install it through Yunohost. But note that it needs to have its own domain, and cannot be installed on a subpath like Etherpad. So the first step is to make a new domain that is visible on the public internet.
If you installed yunohost in the cloud, then you can use the domains section of the yunohost admin interface to make a new subdomain of your nohost domain (e.g. lichen.mycutename.nohost.me) or a new subdomain of your own custom DNS that you configured with yunohost (e.g. lichen.mycutewebsite.com).
If you installed yunohost on a local server, then you can use the domains section of your yunohost admin to make a new subdomain of commoninternet.net (e.g. cutesite7000.commoninternet.net), and then register this domain on the tunnel gateway https://gateway.commoninternet.net (note that its fine to register multiple domains on the gateway that point to the same IP address).
Once you have a domain for your lichen website, you can then install Lichen-Markdown through yunohost onto your domain, and if it works, when you visit your domain, you should see the generic Lichen-Markdown starter page.
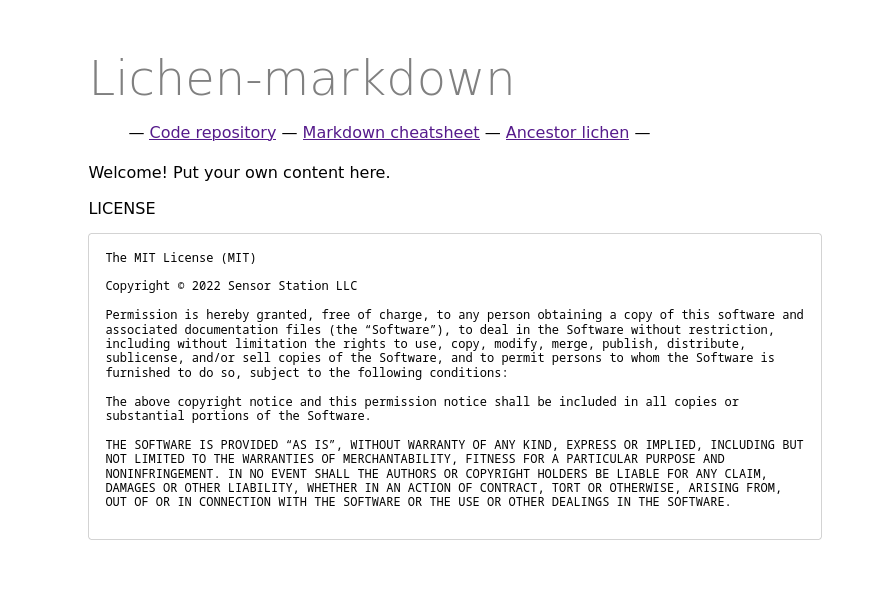
Now that Lichen-Markdown is running, you can start editing the content and style of your website through the admin interface.
Visit yourcutedomainyouchose/admin and then you should be prompted to enter a username and password.
The username is ==admin== and the password is whatever you chose during the installation.
Once you login, you should see an editing interface like this:
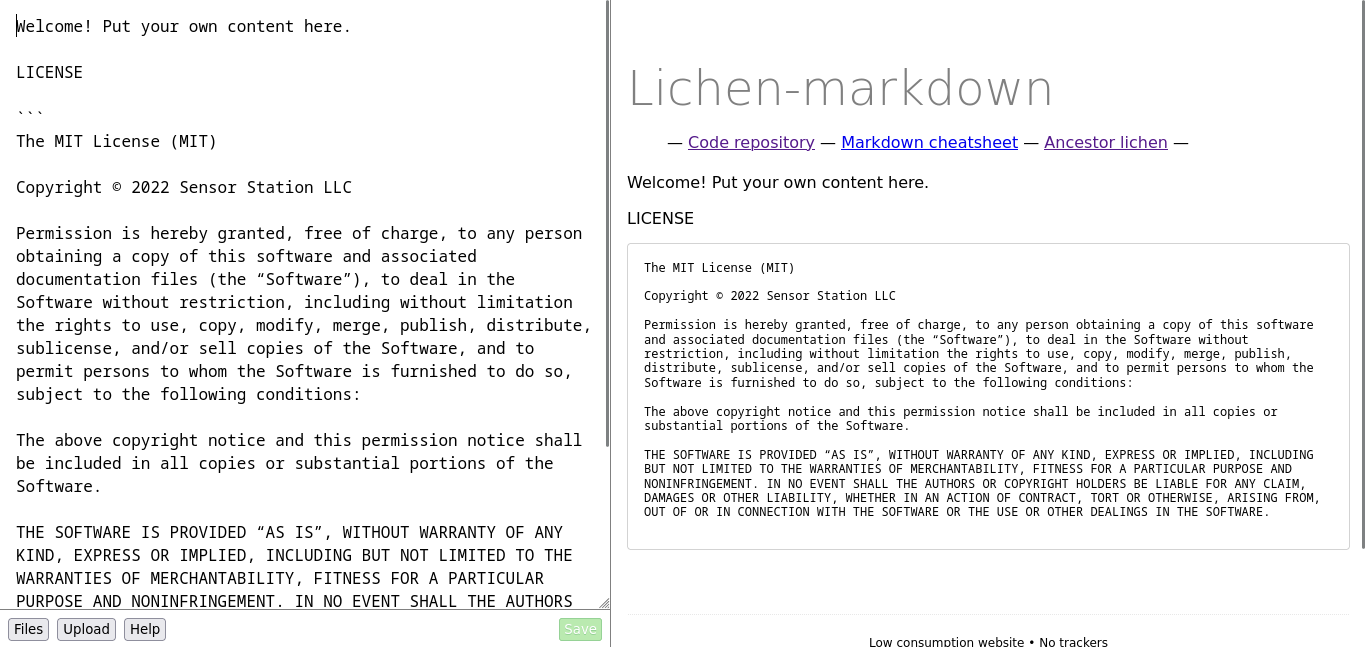
You can edit the text on the left, and a preview of what it will look like will appear on the right. Click "Help" for some tips on markdown syntax, which will also include a link to a more detailed guide about markdown here. When you click "save" your changes will be saved, and visible on the public internet at the URL of your site (you're already self-publishing).
If you click "Upload" you can upload an image, and it will also insert the correct markdown at your cursor position to show that image on the page.
If you click "Files" you will then see the interface where you can add new files, and edit the header, footer and style of the site.
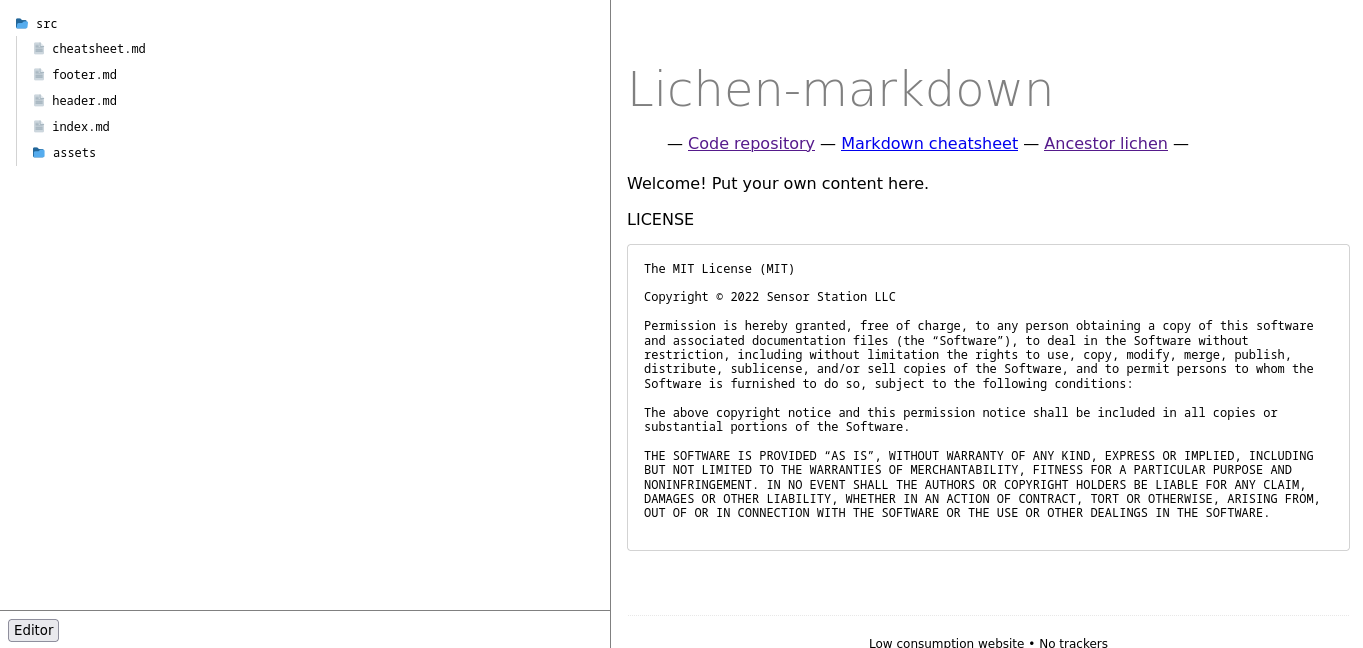
From the files pane, if you click on "footer.md" or "header.md" you can then edit (or remove) the header and footer that appear on every page of the site. Note that if you want to have links to all the pages on the site in the header (a common website navigation pattern) you have to manually add these links to header.md. This is one of the inconveniences of the lichen-markdown limited-automation approach to website making — other more automated tools might have other ways of doing this, but if you don't have that many pages on your site you want to link to, then manually adding links to header.md isn't much of an issue.
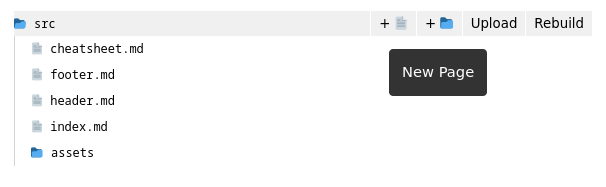
By hovering over a folder on the file navigation, you should see an option to add new pages or folders via the buttons with a plus next to them:
If you click on "assets" and then "stylesheet.css" you can also edit the CSS for the entire site which effects how it looks.
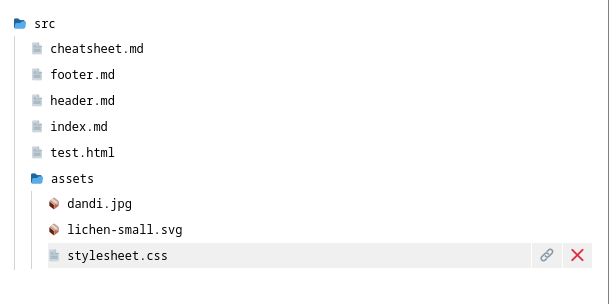 For example, add the following snippet of CSS to stylesheet.css to make your website blue:
body {
   background: blue;
}
A full guide to learning to write HTML and CSS is here. In this guide, they hand-write the HTML and publish it locally, but all the info about HTML and CSS applies equally as much to lichen-markdown as to their guide.
You can also watch a video tutorial about the basics of CSS by Laurel Schwulst here.
And a video tutorial she made about the basics of HTML is here.
LLMs will also give pretty good explanations of CSS if you ask it specific questions about what you are trying to do.
Lichen-Markdown adds some convenience on top of hand-writing HTML because you can add and create pages through the browser, and whatever changes you make to footer.md, header.md and stylesheet.css apply to every page — beyond that its not a far cry from working directly in HTML, which is the basic bedrock format of most of the internet.
Someone once described Lichen-Markdown as a halfway house between a CMS and hand-writing HTML, which seems accurate lol.
⚘⚘⚘⚘⚘⚘⚘⚘⚘⚘⚘⚘⚘⚘⚘⚘⚘⚘⚘⚘⚘⚘⚘⚘⚘⚘⚘⚘⚘⚘⚘⚘⚘⚘⚘⚘⚘⚘⚘⚘⚘⚘⚘⚘⚘
Lichen-Markdown is free software, and a sort of experiment in learning about HTML, permacomputing and self-publishing. Use as inspired — any feedback, feature requests or bug reports are welcome.
Also note, that any websites you make with Lichen-Markdown, or skills you learn using this tool, can also easily be published and translated elsewhere, through more conventional platforms, like github pages, or with other markdown CMS (this will be covered in another tutorial).
Permacomputing Business Models
Because Lichen-Markdown has fewer features, and focuses on simplicity, the codebase can also be smaller and simpler too. In some sense Permacomputing, and Lichen-Markdown, is an experiment in valuing simplicity instead of denigrating it, and a range of intersecting values, aesthetics and affordances that come along with this.
Having a small codebase also relates to certain questions about financial sustainability and maintenance that relate to a lot of questions in open source. Additionally, to what degree are corporate software ecosystems and free software ecosystems separate, given how funding flows from corporations to open source, either directly, or by giving software developers financial freedom to work on free projects?
Complicated software takes more time and energy (and thus usually money) to build and to maintain — crypto projects often try to come up with alternative business models for sustaining software, but they keep the complexity and even add to it. Part of my interest in permacomputing is to ask if we make simpler tools, can we also potentially maintain them more easily and in different ways. This may not be the case for all contexts, but there might be contexts where it is true.
Here are some references related to these topics of alternative software business models:
weird
https://blog.muni.town/weird-inc/
kinopio
sweet privacy policy
https://about.kinopio.club/posts/privacy-policy/
organic software article by creator of kinopio
https://pketh.org/organic-software.html
interesting forum thread about kinopio adding a donation banner, and whether this donation banner should be visible by paid users or free users
https://forum.kinopio.club/t/yearly-recurring-donation-button/1500/9?u=notplants
interesting kinopio design example
https://kinopio.club/a-winter-studio-visit-in-the-brand-new-year-uGsiai3EyueGjZeckIVih
more projects
- are.na (https://www.are.na/)
- atproto (https://bsky.app/)
- rad reader
- twos
Backups: Encrypted, Automated & Manual
In the ten week solidarity infrastructures class, we walked through how to run software on a self-hosted server on your own local laptop, or in the cloud, but we didn't get around to talking about backups in depth.
While getting the server up and running is most of the work, setting up backups is a non-trivial task that is often forgotten or pushed aside. If you want to make more than zero reliability commitments to your users (which also could be fine, but depends on what you are doing) than having some kind of backup system is necessary, as computer hardware does inevitably sometimes break.
If you are running your server in the cloud, with a provider like Digital Ocean, then backups are pretty easy to set-up, because Digital Ocean has built-in services for automated backups of your entire server that you can pay for. Through the Digital Ocean web admin interface, you can configure any droplet to create automated backups every week or day (depending on your preference), and they also make it very easy to re-create (restore) a droplet from a backup when you need to. This is one of the things that cloud providers make significantly easier than in-person self-hosting. Although cloud providers tend to charge a lot for storage space — so if your server uses more than a few GB of storage, cloud providers are often much more expensive than if you hosted it locally.

On the other hand, if you have a local server without a backup, and your hard-drive fails, you will lose your data. For so many of the beautiful projects people made this would be a shame, so lets talk about ways to back things up.
Simple Backups With Lichen-Markdown
If you used Lichen-Markdown to make a website, then just this week (april 2, 2025) we added a simple way to export (& backup) your website contents through the admin interface. Through the yunohost admin interface, under the "System Update" section, you should see the possibility to update any installed Lichen-Markdown applications to the latest version. After updating, there will then be a new "export" button in the Lichen-Markdown admin interface, when you hover over the "src" folder.
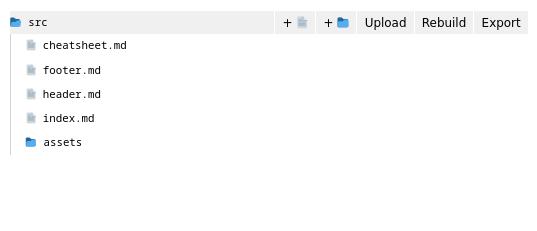
Clicking "Export" will cause a new file called "export.zip" to be created in the assets folder, which contains the entire contents of your website in a zip file.
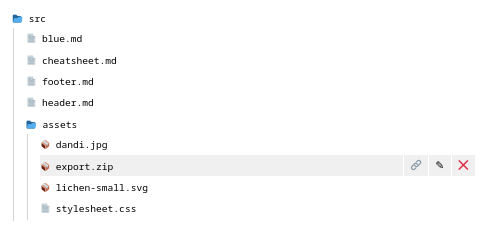
You can then click on export.zip in the files navigator, and this will cause your browser to download the file. This .zip works as a local backup of your site and its contents. This longer tutorial explains the different ways that you could use export.zip to re-create your website or move your data somewhere else.
Simple Backups With Any Yunohost App
The previous method is a very simple, manual (not-automated) way to backup a lichen-markdown website from your server to your local computer. You can do something similarly manual with any application installed via yunohost by going to the "Backup" tab of the yunohost admin interface and then clicking "Local archives". If a backup does not already exist, you can click "Create Backup" and create a new backup, either of a particular app, or of all of your apps and the entire yunohost server configuration. Depending on how much data you store on your server, creating the backup can take some time, but after its created your backup should appear in "local archives" and after clicking on your specific backup, you can click "Download" to download a copy of this backup to your laptop through your web browser.
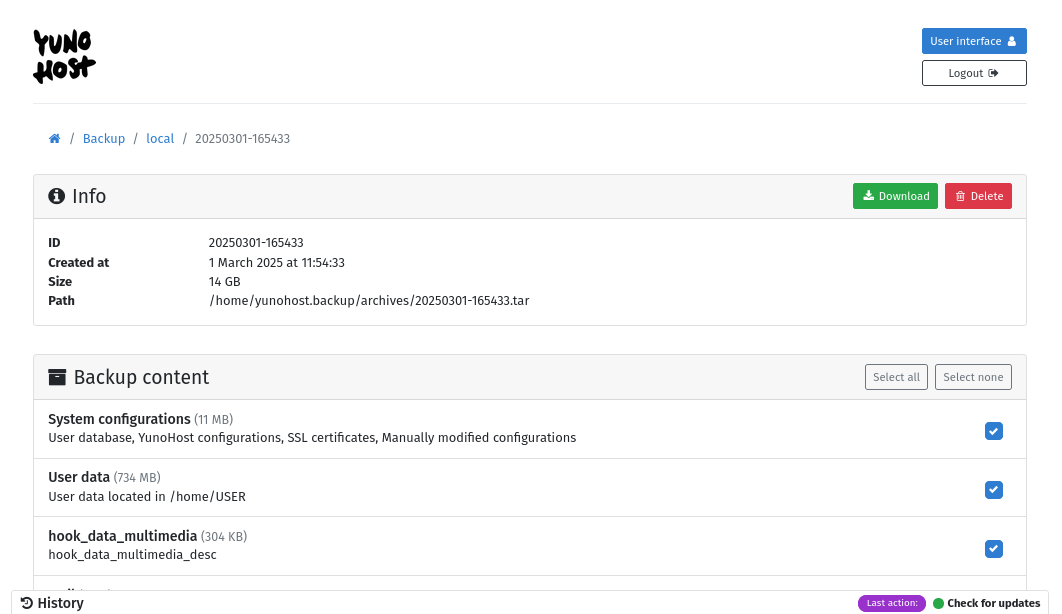
In the future, it is also possible to re-install yunohost, and then restore the entire system, or a particular application, from a backup downloaded in this way.
Manually doing simple backups like this is probably fine for many creative projects, personal websites, and learning experiments, but for more robust applications, some type of automated backup system is probably a good idea.
Automated Encrypted Backups With Borgbase
The backup method that I'm about to describe is the backup system I've used for the Solidarity Infastructures class server — with so many students and teachers making regular contributions to the class wiki, class etherpad, and other class resources, I would really not be happy if the server randomly crashed one day and all that data (or even the last couple weeks of data) was lost. For this reason, for this particular context I thought it was important to setup an automated and encrypted backup system for this server. It took a little bit more time to setup, but once setup, I can happily say that its ran smoothly and hasn't required any additional maintenance yet.
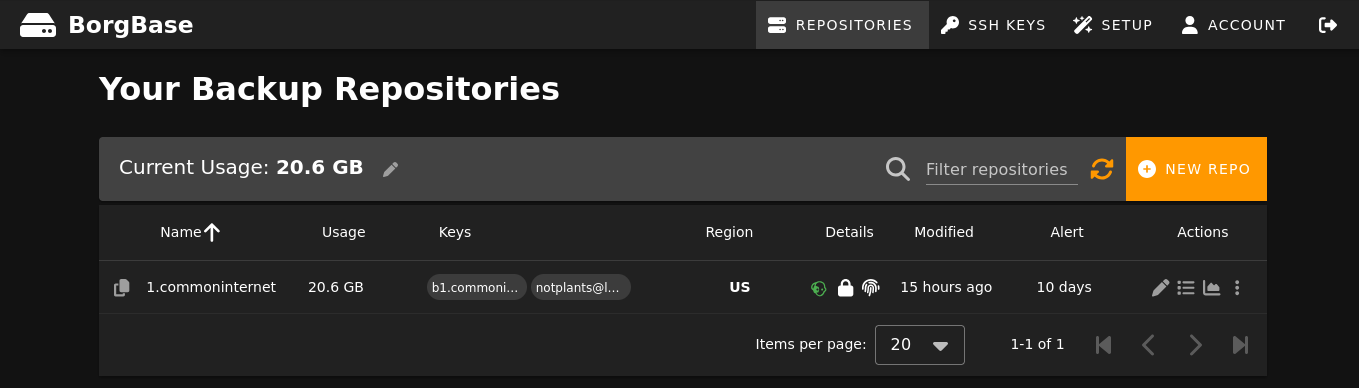
Borg is an efficient and encrypted open source backup software that can be used for regular automated backups of a server. Borg can actually make backups which get stored anywhere (on another server, on your laptop, in the cloud, on an external USB drive). There are also cloud service providers that work in combination with Borg, which let you upload encrypted borg backups to them, such as BorgBase.
Personally, I find this to be a really nice hybrid local/cloud approach. Your backups uploaded to BorgBase get the reliability of a cloud service provider (paying someone to make sure backups are replicated and reliably available, presumably themselves following the 3-2-1 backup rule), but you only ever provide them with encrypted data which is encrypted locally on your server before it is uploaded to the cloud (thus also providing privacy and autonomy).
Yunohost also has a nice integration with BorgBackup. To set this up with yunohost:
- First create an account with BorgBase (which we will use as the backup target)
- Then install the BorgBackup app just like any other Yunohost App onto your server (through the applications section of the yunohost admin interface) and configure BorgBase as the backup target.
After that, your Yunohost server will start saving automated encrypted backups to BorgBase. For peace of mind, through BorgBase you can also configure an automated e-mail alert which will e-mail you if there is ever some period of time (e.g. 10 days) where there wasn't a new backup uploaded to BorgBase from your server.
Automated Encrypted Peer To Peer Backups
As mentioned in the previous section, its also possible to configured BorgBackup to store backups other places than BorgBase. An interesting variation of this would be to have multiple different Yunohost servers acting as backups for each other. In addition to the "Borg Backup" app for Yunohost (which creates and uploads backups to a target), there is also a "Borg Server" application for Yunohost which allows a Yunohost server to act as a target for backups to be saved to. Theoretically it would be possible for two different servers, in different places, to act as solidarity backups for each other in this way (although I haven't yet personally tested this). If a group of people end up trying this out, I'd be curious to hear how it went — in addition to a swap, a larger group could also try other patterns (like a ring, or backing up to two different places). Cobox was also an interesting project in this direction, although it appears that it hasn't had any updates in the last three years — maybe there are also other newer projects exploring more systematic approaches to this (although as mentioned, it doesn't necessarily need to be systematic beyond any collection of people coming up with a system that works for them).
Methods Of Publishing HTML
In the last week of the Solidarity Infrastructures class, we made a webring using Lichen-Markdown — but a self-hosted server with Lichen-Markdown is just one (fairly esoteric) way of making HTML websites. For folks who are new to website making, I wanted to also point to some other ways to make and share a website, that are also portable from Lichen-Markdown, meaning that in the future, if you want to move your website out of Lichen-Markdown and use a different tool you can do this without losing your past work or data — additionally the languages you lean to style a website in Lichen-Markdown (HTML, CSS and Markdown) will also be the same with most other website-making tools.
So this will be a tutorial briefly mentioning other ways of making websites, self-hosted and otherwise. The preceding tutorial on making a website with Lichen-Markdown is here.
The topics discussed in this tutorial will be:
-
Handwriting HTML
-
my_webapp for Yunohost
-
Github Pages
-
Publishing A Website With May First
-
Self-Hosting A Website Without Yunohost
-
Publishing A Website To Arweave, IPFS or ATProto
\

Handwriting HTML
Lichen-Markdown has been referred to as a halfway house between a CMS (content management system) and handwriting HTML. With a CMS, you use the interface of the CMS (like Lichen-Markdown, Wordpress or Processwire) to create and edit the pages on your site. Often with a CMS there is a graphical interface that lets you do things like add images, tables or other even-more-complicated widgets and components. Lichen-Markdown is a "halfway-house" because it doesn't provide many graphical extras (like many other CMS), but it does let you edit and create pages through a web interface, and use a layout for the whole site (which you can modify by editing header.md, footer.md, and layout.php) which lets you make changes to this general layout in one place (which is not possible with handwritten HTML).
With handwritten HTML, each page is totally independent, so to change something about the header of every page of the website, you would need to individually edit the header of each html file. But if you have just one, or a small number of pages, on your site, this could be a fine approach. Everest Pipkin even hand-updates the RSS feed for their site.
Fundamentally, a handwritten HTML website is a folder of files — files of HTML, CSS and images. This is why Melanie Hoff refers to the whole internet as one giant interconnected Folder Poem. A folder of files for a website can also include Javascript files, but these are only necessary if the website has interactive components.
The most basic handwritten HTML site is a single HTML file, for example you could create a file on your laptop called index.html and start writing HTML into it with your text editor (e.g. Sublime). You could then open this file in your browser and see your website.
Handwriting HTML is not usually my preferred way to make a website, because of the repetition it can involve, but I think it can be a great way to learn, and the experience of the simplicity and directness of handwriting HTML was definitely an inspiration for Lichen-Markdown and the appreciation of other small and simple website making tools (e.g. https://codeberg.org/thgie/awesome-small-web-publishing).
Some more resources on writing HTML and CSS are here, as well as in these videos by Laurel Schwulst (Basics of HTML, Basics of CSS). Here is another interesting resource about HTML and boundaries made by Melanie Hoff.
I wanted to start by talking about handwriting HTML, in part because a key part of the rest of this tutorial is based on the fact that most of the website-making tools mentioned (Lichen-Markdown, static site generators) actually produce a folder of HTML which is exactly the same as if it had been hand-written.
Such a folder of HTML can be viewed locally on your computer using your browser. You can double click the HTML files to open them in your browser, or you can start a small local web server to "serve" the whole folder as a local website. To serve a local folder as a website, in the terminal run the following commands:
cd path-to-your-local-website-folder
python3 -m http.server
You can then view your website by navigating to http://localhost:8000 in your browser.
The other five sections of this tutorial are about ways of sharing such a folder on the public internet, which is why this tutorial is titled "Methods Of Publishing HTML". But for any of the methods, the first-step is creating a folder of HTML, CSS files and assets (images, audio files, etc.) that represents your website. There is also a tutorial here about how to export a folder like this from Lichen-Markdown. Such a folder is sometimes called a "static website" or a "static artifact" or a folder of "static assets". Such a folder can be viewed locally with your browser, and the next question is how to make such a folder visible on the public internet.

my_webapp For Yunohost
Yunohost provides an app which can be used for serving a folder of static files as a website — aptly named "my_webapp".
You can install my_webapp through the Yunohost admin interface just like any other yunohost application, and it will create a folder on your server which gets served as a website at the domain you chose for my_webapp. You then just need to copy over your static website files from your laptop into the folder on your server served by my_webapp. Copying your website files over to the server can be done using sftp, scp or rsync. TODO: each of these should link to a tutorial on how to use them for this.
Thus, using my_webapp, you can create a website folder on your laptop using any tool that you want (a static site generator, handwriting HTML, etc.), and then copy over the result to your server to be served as a website via my_webapp. Just using mojojojo-style repetition here for clarity.
Github Pages
While copying over a folder of HTML files to your yunohost server to be served by my_webapp is in some ways more general than using Lichen-Markdown, it is still a pretty esoteric way to put a website on the internet. We are not self-hosting fundamentalists here, so I also want to leave a pointer to an easy and more conventional way to serve a website.
Github provides a free way to publish your static website onto the internet called Github Pages. There is a tutorial about how to use it here, as well as many other places on the internet.

Publishing A Website With May First
As a middle-ground in between self-hosting your own website, and publishing your website to Github Pages, you could also get a May First membership for ~50 usd/year, which comes with other perks, and then also publish your website to May First. Here is a guide on how to copy over your website files to your May First server after you've signed up: https://help.mayfirst.org/en/guide/how-to-connect-to-your-website-host-with-ssh-or-sftp (although a more beginner-friendly guide could be made and perhaps I should contribute one).

Self-Hosting A Website Without Yunohost
This method is also left as a pointer to know about rather than as a detailed guide. But I just want to mention that on a self-hosted server, you also do not need to use Yunohost or "my_webapp" to serve a website.
A more "traditional" way to serve a website from your server would be to use a web server on your server directly, like nginx or apache. For example here is a guide on how to serve a website on a server using nginx. If you want to learn more about servers and hosting, trying to serve a website on your server with plain debian via nginx would be a good learning exercise. In the backend, yunohost actually uses nginx as its webserver, and this is exactly what my_webapp is a wrapper for.
Publishing A Website To Arweave, IPFS Or ATProto
A theme of this tutorial is that a folder of HTML files is actually a very versatile, archivable and portable format which can be published and used many different places.
Each of the methods listed so far still involved publishing a website to one particular place. This last section is pointing to possibilities of publishing a folder of HTML files using some type of distributed protocol.
Many people have explored this, although none of these methods are particularly popular yet. Arweave in particular makes a lot of claims on their website that seem really questionable to me (as I've written about here), but they do also have some interesting ideas. Here is a tutorial on how to publish a website to IPFS using pinata. I'm still researching if you can only write Markdown to white-wind or if there is some other way to publish HTML to atproto. So far none of these methods have resonated with me as more compelling than publishing a website to the World Wide Web, but I wanted to leave this note mentioning the possibility of publishing HTML via other protocols, and as an open-ended question.
Publishing As A Relational Practice
After spilling so many words about different technical methods of publishing HTML, I wanted to end this tutorial with a link remembering that publishing is ultimately a relational practice. May all our html divs contribute towards that.
https://livingbooks.mitpress.mit.edu/pub/u72nuu61/release/1 (actually this link is not my favorite, and if you know of a different essay or article about publishing and community weaving, please send it my way)

Succession Plans & Mycelium Life Cycles
This section is still a work in progress.
While self-hosting has many technical challenges, in some ways the technical challenge of getting things running is just half of the story.
Backup plans and succession plans are two important aspects of resilient infrastructure that are often overlooked in self-hosting, if you want to offer a service with more than zero reliability guarantees. Zero reliability guarantees can also be fine for things where its communicated that "it is there as long as its there and that's it" — but if someone is depending on something, that's often not sufficient. It's good to be clear about this.
For example, with this wiki, I've put a lot of work into daily automated encrypted backups, because I and others are putting a lot of work into content in this wiki, and if the computer it was running on unexpectedly crashed, losing this work would be a huge pain.
However, I'm actually not currently totally happy with the succession plan for this wiki and the class materials. If SFPC had a community infrastructure working group, or a tech coop they worked with, that might be a more reliable option, but as it stands, there isn't currently an enduring group of people with an interest in maintaining the infrastructure the class depends on or for archiving the class materials.
A "succession plan" is the plan for what happens when the maintainer(s) of a piece of a software become unavailable to continue maintaining it — because of injury, emergency, illness, death, a change of life circumstances, or a change of priorities.
A short tangent: for open source software, succession plans are also a potential computer security threat vector — there have been cases where a piece of previously trusted open source software has been handed over to a new maintainer who introduces malware into the code. How software dependencies are to be trusted is an open question, with many different approaches (rabbit hole: https://socket.dev/).
Currently this wiki has no clear succession plan, and if I dropped dead tomorrow, it would probably continue to run for a few months, and then at some point, domain names would expire, the server would crash, or something else would happen which would make the information inaccessible.
Its one of my goals to get more clarity about the succession plan during this season of the class, and I'm open to ideas from students.
I currently have two main ideas:
- Spore/Mycelium Succession Plan
Most living organisms have multiple phases of their life cycle, that are suited to different seasons and periods. For example the way deciduous trees lose their leaves in the winter, and re-grow in the spring. Many mushrooms have even more complicated life cycles that involve multiple different stages, that don't even necessarily happen in the same repeating order (one of their many forms of queerness).
With this as inspiration, the idea behind the Spore/Mycelium Success Plan, is to think of the class infrastructure in terms of life cycle phases. During the active period of a class time, a server comes online which hosts the class materials (Outline, Nextcloud). During the dormant period of class, the services are taken offline, and stored into easier-to-archive static forms, such as PDFs and HTML. In this vein, I've worked on a script which converts an export from Outline, into a static HTML artifact, using a tool called mdbook. This is still a work in progress, and requires some manual steps, but it was how this mdbook was generated.
To further increase the resilience and clarity of this succession plan, I would like to document what the different life cycle phases are, and see if there are volunteers who would like to steward redundant copies of the static artifacts. A balance needs to be found here, to source additional help, but not be unrealistic about the levels of maintenance or stewardship that would burden people. For example, automated systems could be made that distribute backups from the class server, to backup stewards, who then learn how to re-activate the backup into a "living organism" if they need to. More clarity and discussion is needed here.
- SFPC Community Infra Working Group
If SFPC had a community infra working group, this would be a natural group to keep track of class documents and archives, that would be more resilient than the maintenance capacities of individual teachers. Alternatively, a "Solidarity Infrastructures Community Infra Working Group" which is specific to Solidarity Infrastructures, but not general to SFPC, could also be possible, but I think we also need to be realistic about the capacities and commitments of different participants of the class. For most people, a class is a temporary thing, and not something they want to have an active long-lasting stewardship relationship with — this is totally fine — but to come up with a real plan for resilience, we need to be realistic about people's actual capacities and stake in the project. More clarity and discussion is also needed here. Maybe SFPC would be open to a proposal for a community infra working group, or something like that, at some point.
The Signal Stack
While this class is a deep-dive into how to self-host, its not my expectation that self-hosting is actually the best option for most people. Even if you have the technical knowledge and time to self-host your own infrastructure, this is less resilient than using infrastructure that is managed collectively.
Its more the hope that through learning about self-hosting, you can better understand the technology you use, understand self-hosting in the context of the open source movement in general, and practice more discernment in the tools you choose to use and to propagate in the world.
So with this in mind, this last tutorial is a recommended "stack" of tools for different contexts, as of the year 2025.
The Signal Stack
context: a group of people need to collaborate on a project over time
the stack: signal group chat with a pinned link to other infra, e-mail list via may first, nextcloud via may first for file-sharing, etherpad via etherpad.org, spreadsheets via nextcloud, bluesky and mastodon for social media, calendar via nextcloud, forms via nextcloud
This simple stack can cover a wide range of groups and collaborative processes and doesn't rely on surveillance capitalist tech. It costs ~50 dollars per year for a May First membership, and this money goes to a good cause. A chance to spend money on tools that work towards a future you want to live in.
Continued Research For Future Stacks (What Could The Stack Include in 2035?):
Open source moves at a slower pace than the corporate world, but it still moves, and much more is possible today than it was ten years ago. I still remember using Signal for the first time in 2016, when it felt like only my most hackery friends were using it. Now when I meet someone new it's not uncommon for them to offer to connect on Signal. So what non-extractive stacks could be possible in the year 2035? It probably still will not be perfect, but maybe more could be possible than there is currently, and Open Source could eventually seem like a slow-growing set of tools and practices that were refined and passed down over thousands of years.
Some things I could imagine in a stack in 2035:
More P2P and local-first applications.
Open source alternatives to:
- partiful
- doodle
- forms
- tech-coops that host additional more intricate software (outline, matrix, etc.)
Sidequests
Throughout the course, before each technical tutorial in class, I will also offer an optional sidequest for folks who are already experienced programmers and may not need the technical tutorial. These sidequests are meant to be prompts for related exploration that are more technically advanced.
First Sidequest: Terminal Art
Create an artwork or poem for the Terminal using a bash script.
This Terminal artwork should be able to be run entirely via Terminal on a raspberry pi, for example by running a command like ./poem.sh
After creating this, put your Terminal artwork onto the class server at mazhai.commoninternet.net
Second Sidequest: Alternative Tunnel Research
I've done a lot of research on different ways of tunneling and making gateways, but there are many tools and approaches I still haven't explored, and would love your help.
This sidequest is to explore an alternative method of making a local server visible to the public internet, create a short writeup about what you found, and/or make a modified version of the gateway admin interface used by gateway-coop which uses the new tunneling method. If you are interested in this topic and would like more information about it or have questions please send max a message. The current gateway used by gateway-coop uses tailscale, but here are some other possible tools to explore:
- https://narrowlink.com/
- https://github.com/flipt-io/reverst
- https://github.com/rapiz1/rathole
- https://github.com/fatedier/frp
- https://boringproxy.io/
Or for an even-more low-level (possibly life-long) sidequest, create an entirely new tunneling method.
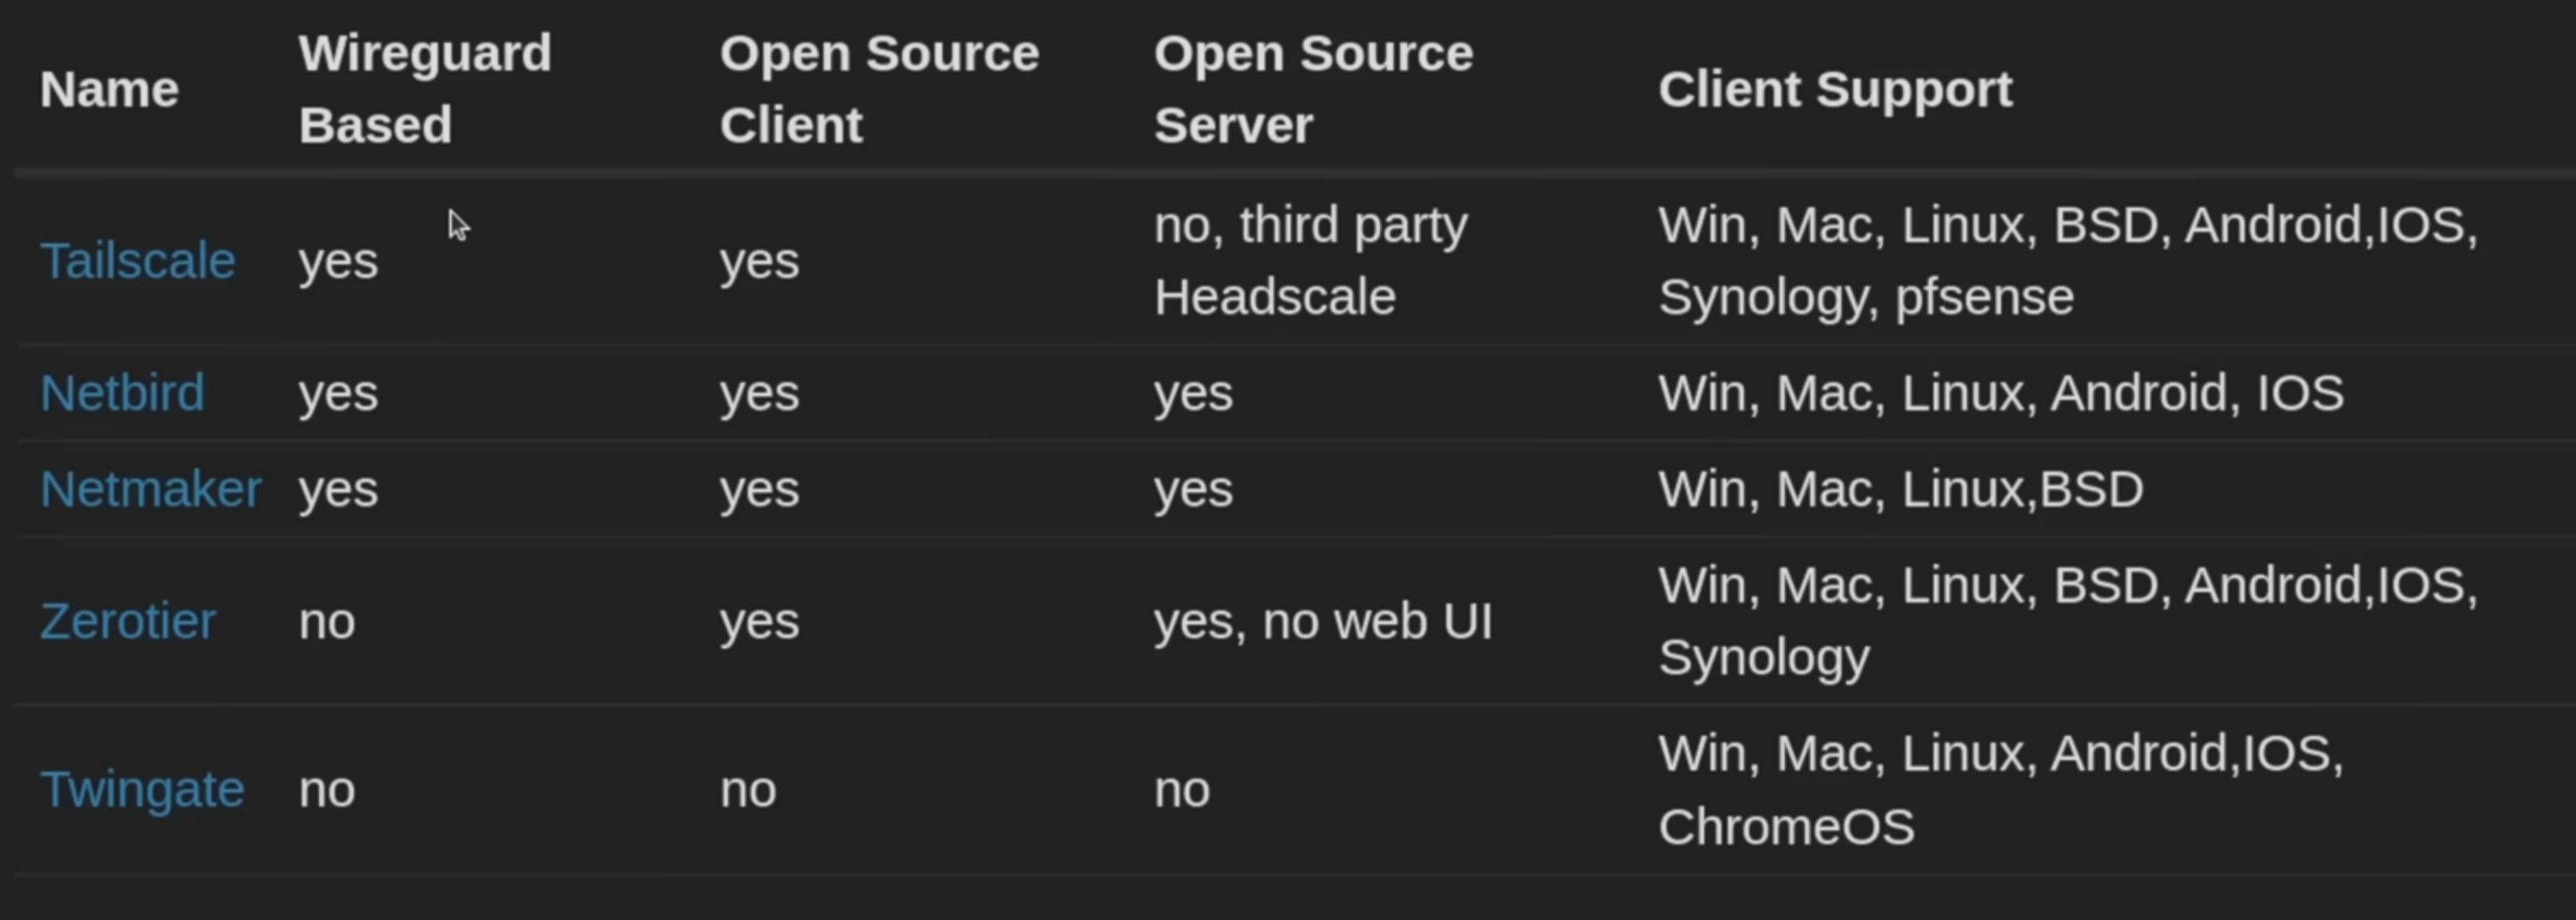
Third Sidequest: P2P Network Latency Tests
On Week Three, we learn how the internet works, and spend some time with maps of internet architecture (https://www.submarinecablemap.com/, Visualizing The Internet). I imagined it would be nice to figure out a hands-on exercise for exploring the internet connections between the participants and servers of the class, but I never was able to get this fully automated to the degree that it could be practically useful. I started experimenting with this in this document, but currently it is too complicated and non-streamlined for most participants to contribute to it. I imagine this could be improved by building some type of packaged tool (probably in one binary), that can be configured to connect to a set of peers (other people in the class) and run a suite of tests, visualizing and recording the results in some way. There are many details to be worked out, but this could be an interesting project to make a real-time multi-player internet visualization and mapping tool along these lines.
Exercise: P2P Network Latency Tests
As we discussed in Week Three, "How The Internet Works?", while we can talk about what protocols the internet uses, its history, and approximately how it works, there is still some degree of mystery to it, in the sense that its composed of billions of actors in a decentralized system. Scientists and network engineers may try to quantify it, but there are still a lot of open questions. Here is a quote from the Week Three Network Topology presentation that is pointing to some of these limits of understanding:
 The idea behind this exercise is to do some "citizen science" / direct observation, and empirically measure the speed, route and latency of internet connection between all of our different servers in this class.
This is definitely not necessary for anything, and it just out of nerdy curiosity for anyone who wants to participate. To participate, you can follow the test outlined below via terminal, and then enter your results onto this wiki page.
As a sidequest, it would be interesting to create a bash script which could automate all the tests below between all the different servers in the class and output one simple result. (note: after making this wiki page, and testing some things out…. I actually think the test won't really be able to give interesting results until a script like this is made, which would make tests more consistent and reproducible… but still feel free to check out this wiki and try out the commands and records what happens, if inspired)
⚘⚘⚘⚘⚘⚘⚘⚘⚘⚘⚘⚘⚘⚘⚘⚘⚘⚘⚘⚘⚘⚘⚘⚘⚘⚘⚘⚘⚘⚘⚘⚘⚘⚘⚘⚘⚘⚘⚘⚘⚘⚘⚘⚘⚘⚘⚘⚘⚘
Test 1. ping
First lets ssh into our server, via ssh yourusername@youripaddress
Now here are some tests we can run about the connection between your server and our class server where this wiki is running (we can use the domain of the wiki o.commoninternet.net for this):
First lets install a command-line tool for testing the latency of a connection:
sudo apt-get install iputils-ping
Then lets use ping to test our network connection to different locations.
This command runs ping 5 times, and returns the average request time:
ping -c 5 o.commoninternet.net
And should return something like this:
--- o.commoninternet.net ping statistics ---
5 packets transmitted, 5 received, 0% packet loss, time 4001ms
rtt min/avg/max/mdev = 26.601/29.783/34.953/2.823 ms
In the above output, 29.783 ms is the average time.
We can then record our different ping results in the table below.
If you are on your server, and your server is connected to the tailscale network, you should also be able to test pinging other classmates servers via their tailscale tunnel IP, and theoretically with tailscale this should actually test the speed of a direct connection from your server to their server.
| Source | Destination | Result |
|---|---|---|
| max's laptop on cafe phinista (Boston, MA) | o.commoninternet.net | 29.783 ms average\n--- o.commoninternet.net ping statistics ---5 packets transmitted, 5 received, 0% packet loss, time 4001ms |
| rtt min/avg/max/mdev = 26.601/29.783/34.953/2.823 ms | ||
| max's laptop | meag (100.95.98.39) | 5 packets transmitted, 5 received, 0% packet loss, time 4005msrtt min/avg/max/mdev = 48.364/116.279/335.396/110.665 ms |
| max's laptop | miriam (100.91.247.20) | 5 packets transmitted, 5 received, 0% packet loss, time 4005msrtt min/avg/max/mdev = 45.328/75.591/178.971/51.789 ms |
| max's laptop | ontology.rodeo (100.84.204.3) | --- 100.84.204.3 ping statistics ---5 packets transmitted, 5 received, 0% packet loss, time 4007msrtt min/avg/max/mdev = 29.296/52.519/89.735/25.449 ms |
| class server (newport, RI) | o.commoninternet.net | --- o.commoninternet.net ping statistics ---5 packets transmitted, 5 received, 0% packet loss, time 4081msrtt min/avg/max/mdev = 0.036/0.062/0.085/0.021 ms |
| class server (newport, RI) | meag (100.95.98.39) | --- 100.95.98.39 ping statistics ---5 packets transmitted, 5 received, 0% packet loss, time 4004msrtt min/avg/max/mdev = 53.697/90.123/234.678/72.277 ms |
| class server (newport, RI) | ontology.rodeo (100.84.204.3) | --- 100.84.204.3 ping statistics ---5 packets transmitted, 5 received, 0% packet loss, time 4007msrtt min/avg/max/mdev = 24.693/31.412/55.160/11.894 ms |
| class server (newport, RI) | miriam (100.91.247.20) | --- 100.91.247.20 ping statistics ---5 packets transmitted, 5 received, 0% packet loss, time 4005msrtt min/avg/max/mdev = 41.682/68.794/173.710/52.461 ms |
| cookies rp3 (toronto canada) | o.commoninternet.net | --- o.commoninternet.net ping statistics ---5 packets transmitted, 5 received, 0% packet loss, time 4006msrtt min/avg/max/mdev = 26.483/29.211/35.661/3.350 ms |
| cookies thinkpad (toronto canada) | ontology.rodeo (100.84.204.3) | --- ontology.rodeo ping statistics ---5 packets transmitted, 5 received, 0% packet loss, time 4007msrtt min/avg/max/mdev = 27.815/30.889/35.442/3.327 ms |
| cookies thinkpad (toronto canada) | mshamsrainey.commoninternet.net | --- mshamsrainey.commoninternet.net ping statistics ---5 packets transmitted, 5 received, 0% packet loss, time 4009msrtt min/avg/max/mdev = 27.216/31.214/36.985/3.652 ms |
| cookies thinkpad (toronto canada) | hypercyberspider.commoninternet.net | --- hypercyberspider.commoninternet.net ping statistics ---5 packets transmitted, 5 received, 0% packet loss, time 4005msrtt min/avg/max/mdev = 28.668/31.204/35.557/2.349 ms |
| class server (newport, RI) | beepbeep.commoninternet.net | --- beepbeep.commoninternet.net ping statistics ---5 packets transmitted, 5 received, 0% packet loss, time 4007msrtt min/avg/max/mdev = 10.726/13.447/17.038/2.283 ms |
Here is a table of some of the current tailscale tunnel IP of participants of the class (which can be looked up at https://gateway.commoninternet.net):
| mshamsrainey.commoninternet.net | 100.91.247.20 |
|---|---|
| solitest.commoninternet.net | 100.117.251.31 |
| fsserver.commoninternet.net | 100.65.173.2 |
| cookielink.commoninternet.net | 100.106.146.98 |
| ontology.rodeo | 100.84.204.3 |
| junelikethemonth.commoninternet.net | 100.92.68.68 |
| beck.commoninternet.net | 100.71.179.116 |
| yazz.cool.commoninternet.net | 100.92.48.68 |
| newtest55.commoninternet.net | 100.117.251.31 |
| stayhomo.commoninternet.net | 100.89.193.71 |
| passecables.commoninternet.net | 100.77.109.7 |
| hypercyberspider.commoninternet.net | 100.90.180.10 |
| artforage.commoninternet.net | 100.95.98.39 |
⚘⚘⚘⚘⚘⚘⚘⚘⚘⚘⚘⚘⚘⚘⚘⚘⚘⚘⚘⚘⚘⚘⚘⚘⚘⚘⚘⚘⚘⚘⚘⚘⚘⚘⚘⚘⚘⚘⚘⚘⚘⚘⚘⚘⚘⚘⚘⚘⚘
Test 2. wget
First lets ssh into our server again.
For this second test, lets install a command-line tool for downloading things from the internet.
sudo apt-get install wget
Then lets use wget to download the network-topology pdf (34MB in size) from the class server and see how long it takes:
wget --report-speed=bits https://lm.commoninternet.net/assets/network-topology.pdf
Some part of the output should look like this:
network-topology.pd 100%[===================>]  34.46M  35.9Mb/s    in 8.8s

2025-03-11 17:19:59 (32.9 Mb/s) - 'network-topology.pdf' saved [36129034/36129034]
For a second example:
wget --report-speed=bits https://lm.commoninternet.net/assets/luigi.jpeg
Result:
luigi.jpeg          100%[===================>] 114.08K  --.-KB/s    in 0.1s

2025-03-11 17:19:21 (7.37 Mb/s) - 'luigi.jpeg' saved [116813/116813]
We can then enter the results in the table below:
| Source | URL | Time |
|---|---|---|
| max's laptop at cafe phinista (Boston, MA) | https://lm.commoninternet.net/assets/network-topology.pdf | 8.8s (32.9 MB/s) |
| max's laptop at cafe phinista (Boston, MA) | https://lm.commoninternet.net/assets/luigi.jpeg | 0.1s (7.37 MB/s) |
| cookies rp3 (toronto canada) | https://lm.commoninternet.net/assets/network-topology.pdf | 9.9s (29.3 MB/s) |
| cookies rp3 (toronto canada) | https://lm.commoninternet.net/assets/network-topology.pdf | 0.06s (15.9 MB/s) |

⚘⚘⚘⚘⚘⚘⚘⚘⚘⚘⚘⚘⚘⚘⚘⚘⚘⚘⚘⚘⚘⚘⚘⚘⚘⚘⚘⚘⚘⚘⚘⚘⚘⚘⚘⚘⚘⚘⚘⚘⚘⚘⚘⚘⚘⚘⚘⚘⚘
Test 3. traceroute
First lets install a tool to find the route from your server to the class server.
sudo apt-get install traceroute
Then we can use traceroute to test the route via this command:
traceroute -n o.commoninternet.net
This will output all of the intermediary IP addresses that request passed through on the way to o.commoninternet.net. For the test, we won't record all the stops, but just the number of stops, in the table below.
For some reason when I (max) was testing this out, it wasn't working, but I wasn't sure why.
| Source | Destination | Number Of Stops |
|---|---|---|
| max's laptop (Boston, MA) | o.commoninternet.net | ? |
| cookies rp3 (toronto canada) | o.commoninternet.net | 8 |